This post may contain affiliate links. Please read our disclosure policy.
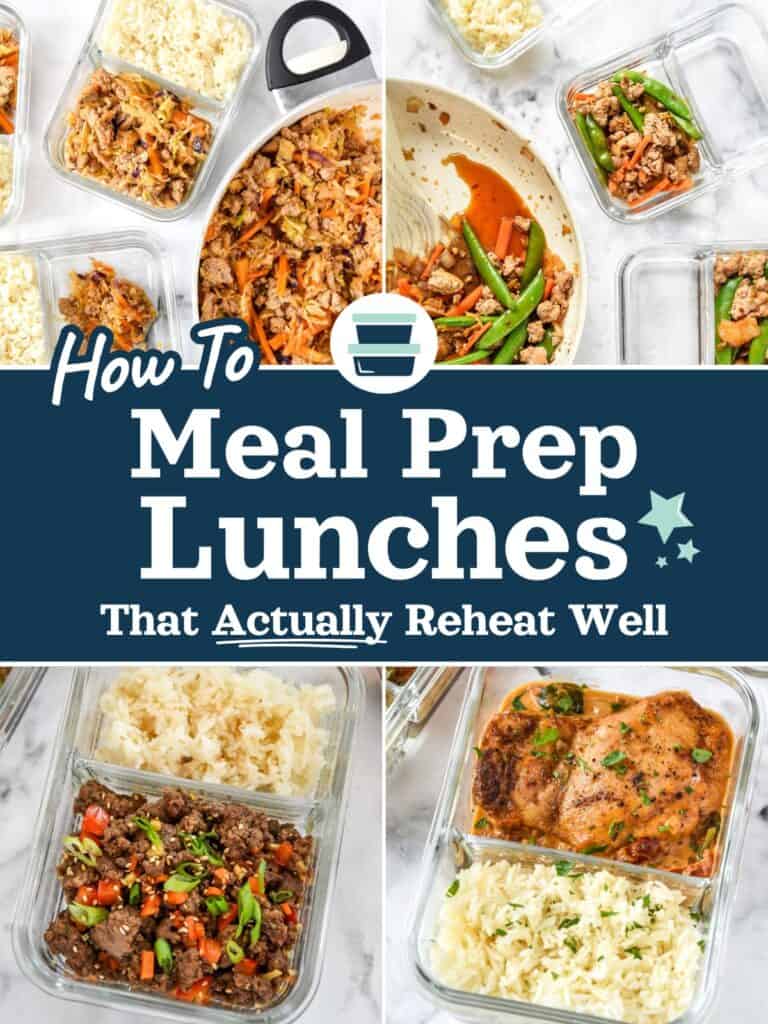
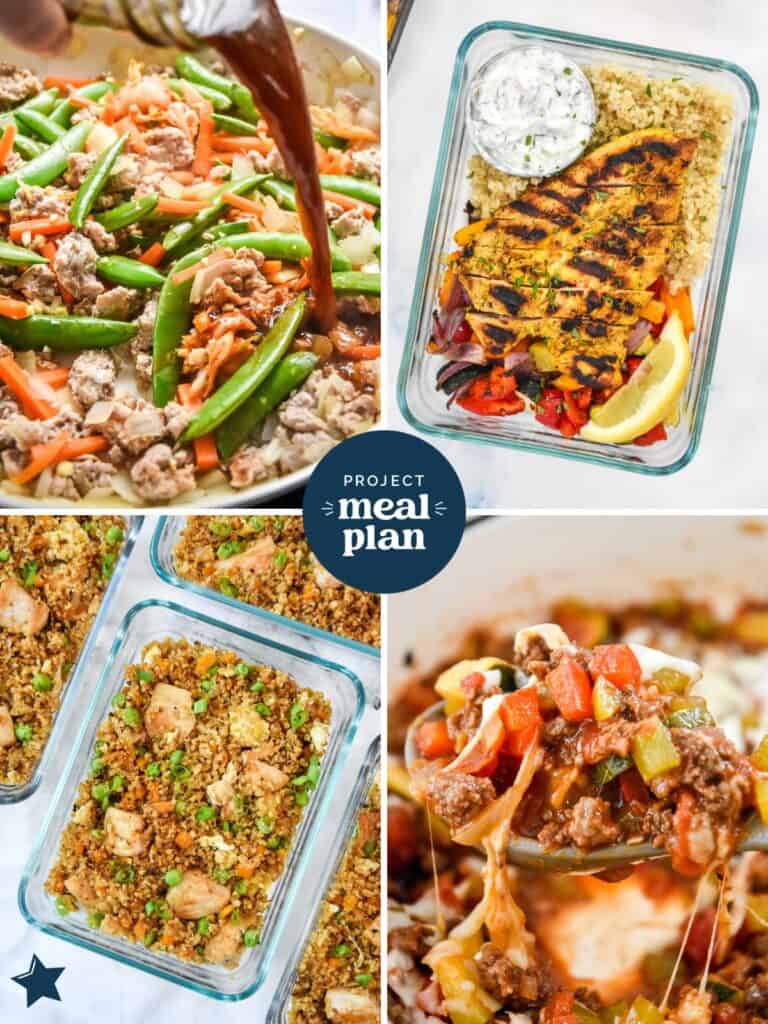
How to Meal Prep Lunches That Actually Reheat Well is your guide to building make-ahead lunches that always satisfy. You’ll learn which foods hold up the best, how to store them, and how to reheat without losing structure or flavor.
Note from Danielle
A really good meal prep lunch can change your whole mood. It can save you time standing in line. It can save you the mental workload of searching and deciding what’s for lunch 🕵️♀️
Meal prep lunches can save your entire day if you let them.
After years and years of meal prepping (especially lunches) for my own household, I’ve compiled an internal playbook 📓 all about how to craft lunches that are still enjoyable days later.
And it’s time to share my reheating strategies with you!! The full list of do’s and don’ts 🚫 Hope this guide helps you nail exactly how to meal prep lunches that reheat perfectly 🙂

Why Some Meal Prep Lunches Fail at Reheating
Picture this: You cooked a delicious meal. You packed it for lunch. And now… you find it’s sad, dry, and mushy after going through the microwave. All of us have been there, myself included. It’s super frustrating, right?
People I know have literally told me: “I don’t eat leftovers.”
And I get it! Reheated lunches can get a bad reputation. Some foods are just downright terrible as leftovers! Dry rice, rubbery dry chicken, soggy vegetables… I won’t argue there.
However, some foods are even better as leftovers than they were on the first day! Meal prep lunches can reheat well, even really well, if they’re designed for it.
The Big Thing: Embracing the right foods and reheating methods can change everything! 🤗
A simple formula for reheating success
After testing and publishing 60+ meal prep lunch recipes for Project Meal Plan, I’ve learned that reheating success isn’t about being a better cook or using expensive ingredients.
It just comes down to:
- Choosing the correct ingredients
- Cooking them the right way for reheating
- Storing them intentionally
- Reheating with moisture included
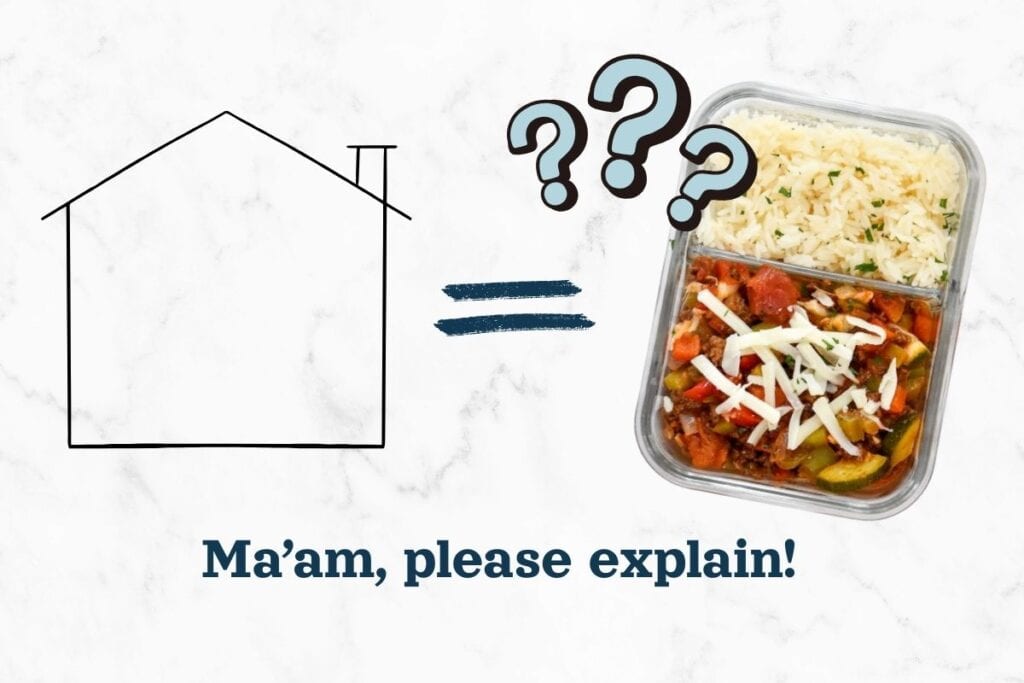
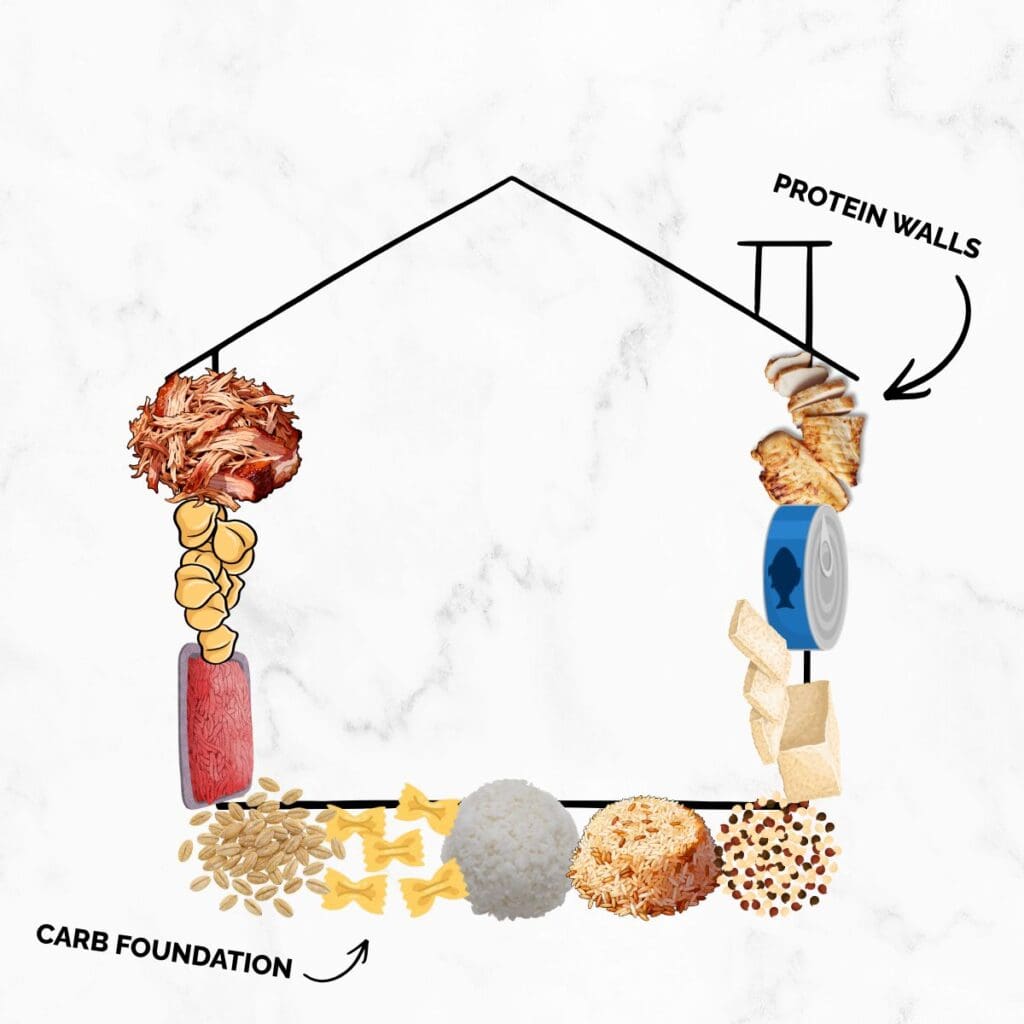
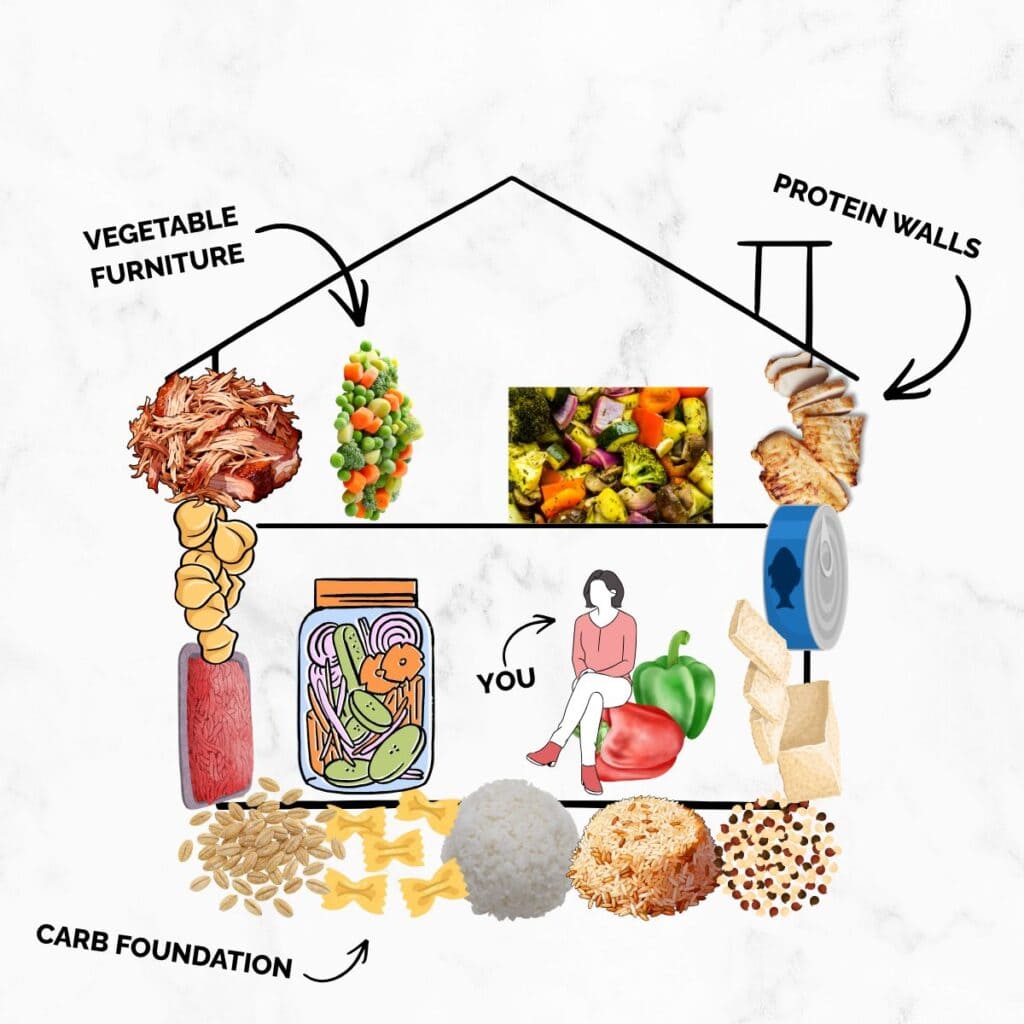
A little thought ahead of time can go a long way later. It’s sort of like building a house. Choosing the correct materials, building them the right way, and decorating the interior intentionally.
Once you understand a few core principles about leftovers, you can stop gambling on reheated lunches and start prepping meals you actually look forward to eating. Let’s break it down, shall we?
✨ Section 1: What Makes A Lunch Reheat Well
Before we talk about specific ingredients, it helps to understand why some lunches reheat beautifully, while others fall apart after that temperature change. There are some principles that hold true no matter the ingredients.
Maybe you got lucky with leftovers once or twice, but creating reliably reheating lunches is more than luck. It’s designed, just like a well-built house is designed. Stay tuned as I continue with this oh-so creative analogy to weave the whole thing together!
When a lunch reheats well, it usually meets at least two (or more) of these criteria:
It’s built to hold onto moisture.
Every good house protects you from the elements. Your lunch needs the same kind of protection. Sounds silly, but just think about it…
Dry food gets even drier when reheated. Moisture just leaves, *bye*. There’s no way around that.
Meals that reheat well almost always include built-in moisture in some way, such as:
- Sauces or dressings (your insurance policy; more on this in Section 5!)
- Naturally moist or saucy components like braised meats, shredded chicken, soups, or stews
- A small amount of added liquid (1-2 tablespoons of water or broth) to create steam while reheating
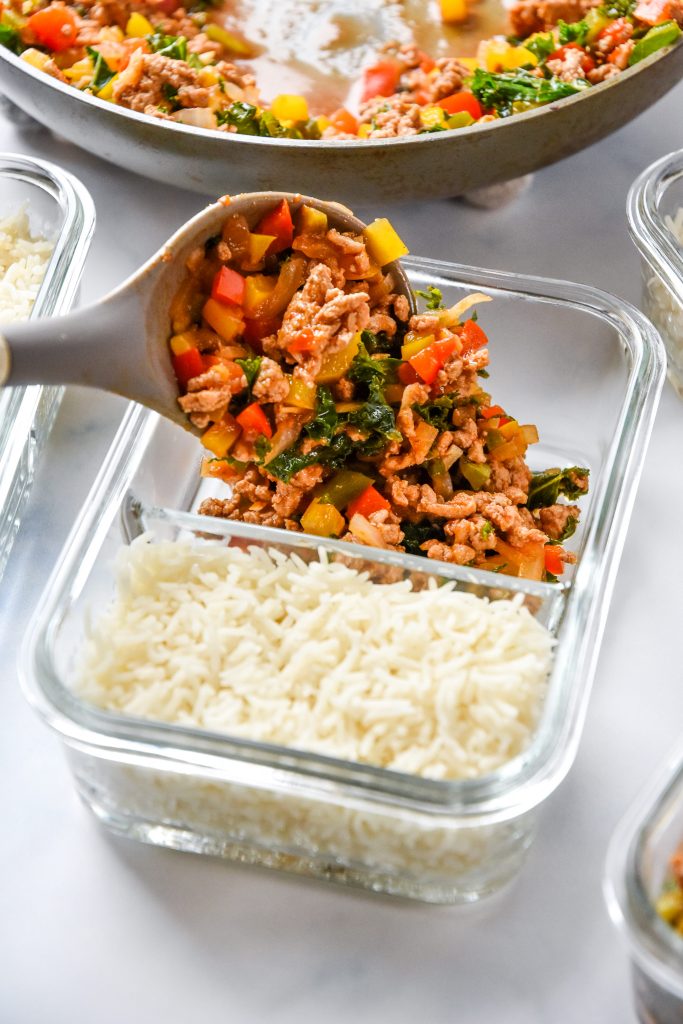
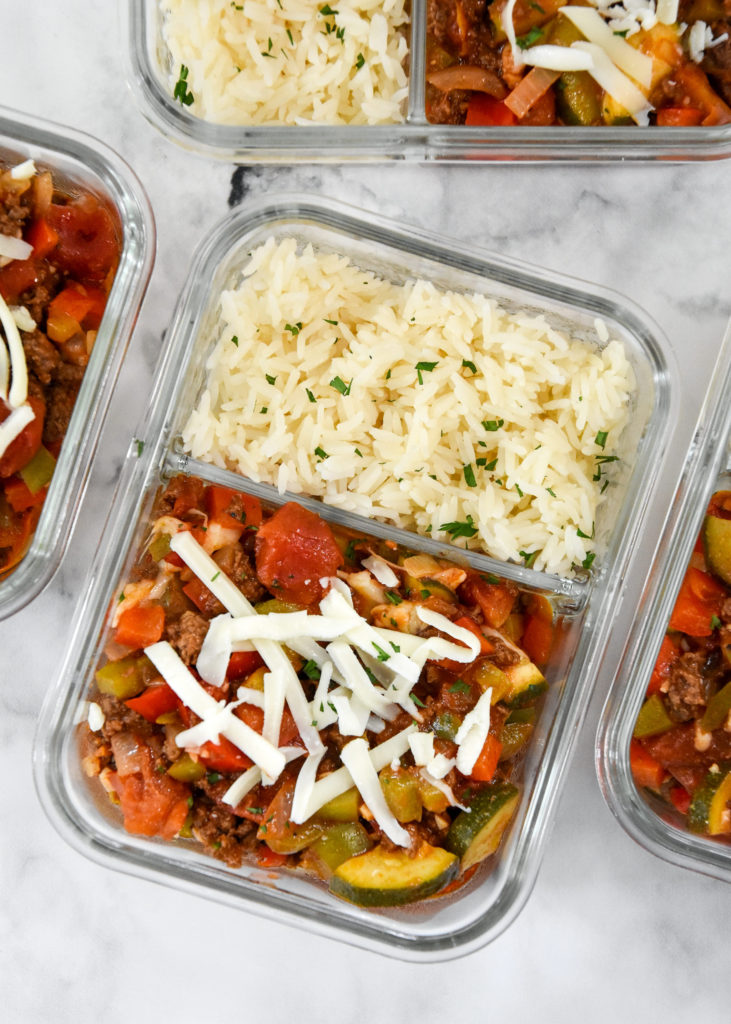
This is why bowls, casseroles, and saucy lunches consistently outperform plain “protein + carb” combos (those are boring anyway!).
Components are stored intentionally.
A strong house doesn’t throw everything into one pile on the inside. It has rooms! And those rooms usually have different purposes.
The same goes for meal prep lunches. Thoughtful storage in different compartments or containers keeps textures intact and flavors balanced. This small step makes a big difference in how food reheats.
→ Examples of intentional storage:
- Dressings stored separately from salads or grain bowls
- Rice, quinoa, or pasta stored separately from very saucy mains
- Using containers with compartments when textures matter
Nothing was overcooked on prep day.
One of the easier ways to prevent meal prep lunches from becoming mushy or drying out when reheating is to make sure they are not overcooked to begin with.
Very slight undercooking on prep day = better texture later!
Many foods continue to “cook” during reheating, especially eggs, lean proteins, and vegetables. If something is already overcooked when you first make it, reheating just pushes it further into dry, rubbery, or mushy territory 📦 (cardboard is not a texture we want in our lunches!)
There’s some fat in the meal.
Fat equals flavor, but fat also helps keep food from drying out by holding onto and adding moisture to the recipe. Fat helps keep food delicious instead of dry, meh feeling leftovers. Zero-fat meals are much harder to reheat successfully than meals that naturally include a bit of fat.
Helpful fats for meal prep lunches:
- Chicken thighs vs. chicken breast
- breasts have less fat and dry out more quickly
- Adding oil-based marinades or sauces (usually after reheating)
- Ground meats with higher fat percentage
Meals with some fat reheat better because fat helps:
- Retain moisture! ← big one, especially with proteins 🍖
- Distribute heat more evenly 🔥
- Prevent that cardboard, dried-out texture 📦
→ For best meal prep lunch results, use a protein that includes some fat, or try to add some olive oil. Better taste, better texture; it’s a win all-around!
✨ Section 2: Carbs That Reheat Well (& How to Store Them)
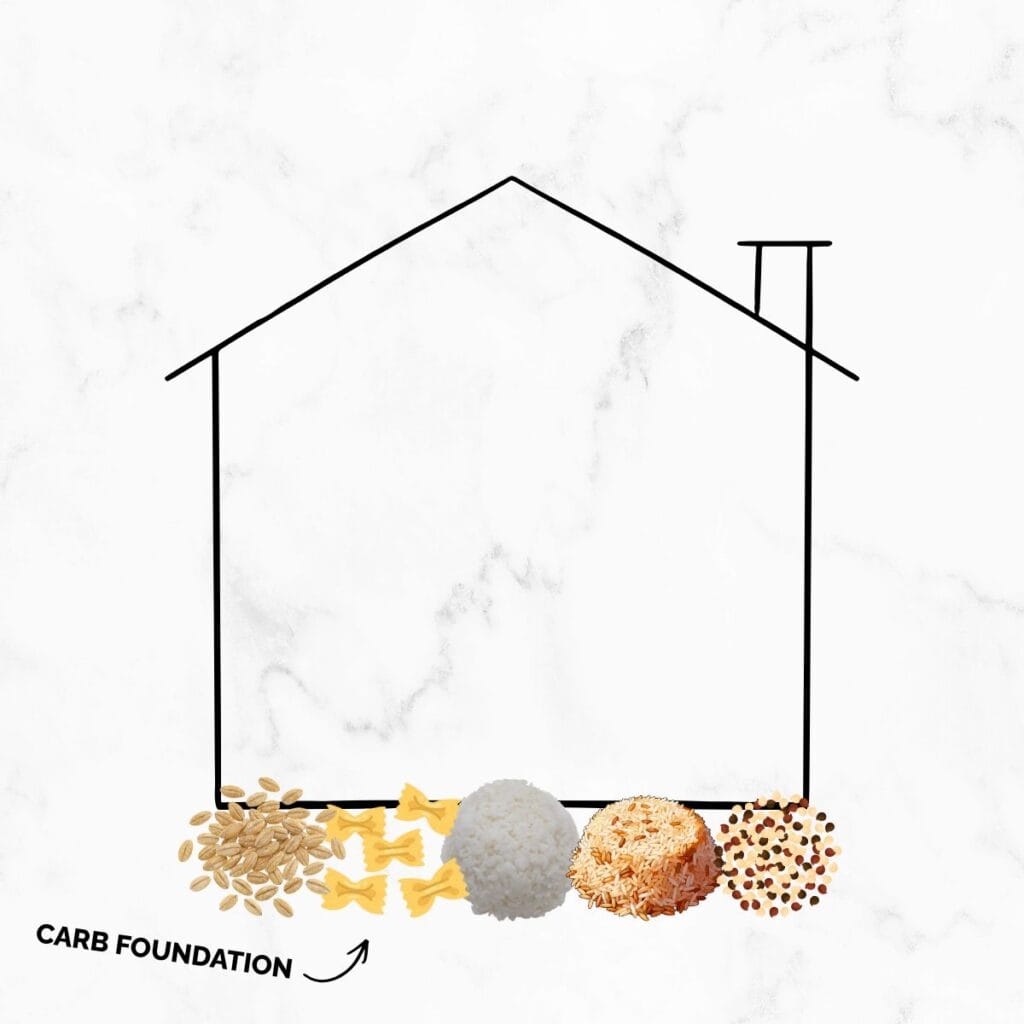
Let’s call the carbohydrate the foundation of our house (remember: the house is our meal prep lunch!).
When it comes to make-ahead lunches that actually reheat well, carbs (and how they’re reheated) matter more than you might think. Here’s where we cover the most common options.
As the base of the meal, dry rice, gummy/mushy pasta, or sad potatoes can totally ruin an otherwise great lunch. I’ve definitely been there more than once. And it very much did ruin my lunch.
The good news is that most carbohydrate issues come down to how they’re cooked, stored, and reheated; not the carb itself.
Here’s how to prep the most common meal prep lunch carbohydrate options so they reheat like you just made them:
✔️ Rice 🍚 (White vs. Brown)
Rice is one of the most popular meal prep carbs at my house. However, it’s also the most complained about on the internet when it comes to reheating. YES, you can reheat rice!
White rice tends to reheat more easily than brown rice. Due to the extra fibrous layers in brown rice, it can be drier and harder than white rice. More on the differences between white and brown rice here!
Brown rice can still work well, but it needs a little extra help. I usually just use white rice, since it cooks much faster.
Tips for meal prepping lunches with rice:
- Don’t overcook the rice, so it won’t overcook or turn mushy when reheated.
- Let the rice cool slightly, then store it while still warm (not dried out). Don’t let all the steam escape (that’s moisture!).
- Do not let it sit out of the fridge for more than 2 hours after cooking.
- Reheat to 165F and steaming no matter the method.
When reheating, adding moisture is the key. A splash of water or broth, plus a loosely covered container helps create steam and revive the perfect texture.
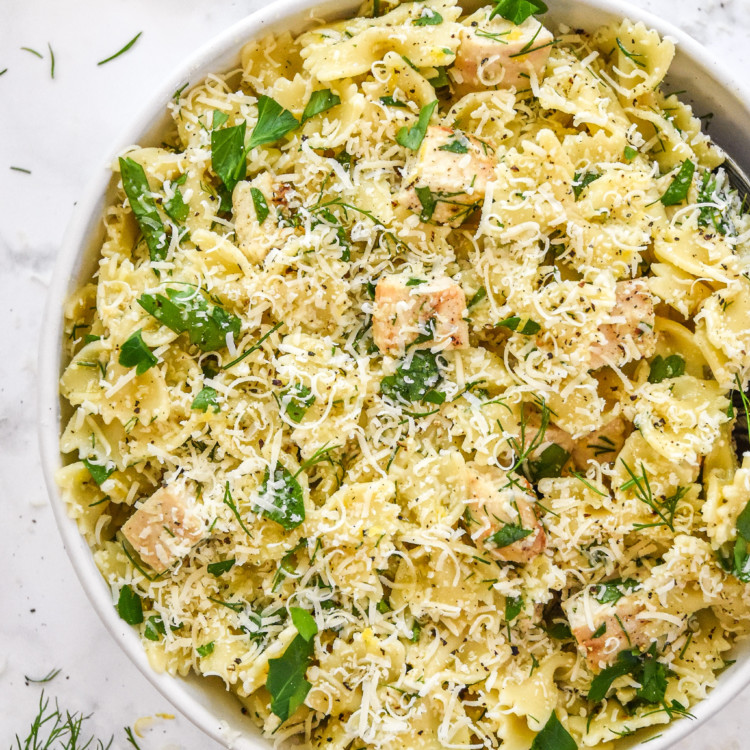
✔️ Pasta 🍝 (Shape Matters + Sauce Coverage)
Pasta can be a meal prep hero or a reheating nightmare clump-a-thon, and it mostly comes down to pasta shape and sauce.
Best pasta shapes for meal prep:
- Short shapes like penne, rotini, fusilli, shells, and farfalle
- Anything with ridges or curves that hold sauce and leaves air pockets between noodles
- Long noodles (like spaghetti) can work, but they’re more likely to clump and dry out, unless they’re very well sauced.
Tips for meal prepping lunches with pasta:
- Cook pasta just shy of al dente (it’ll cook a little more during reheating)
- Avoid storing pasta completely “naked”, a light coating of oil helps!
- A liquidy sauce may absorb into the pasta too much, turning it soggy. Store liquidy (or tomato based) sauces separately if possible.
- Avoid long thin pasta shapes that are likely to clump.
✔️ Potatoes 🥔 (Roasted, Mashed and Baked)
Maybe not the carbohydrate you first think of when we’re talking meal prep lunches, but potatoes are surprisingly flexible for meal prep. You just need to choose the right preparation, and the right reheating method.
Gentle heat (instead of blasting in the microwave on high) is always a good idea for potatoes. This helps keep any additional butter or milk from overheating or scalding during reheating.
→ Roasted potatoes
Reheat well when roasted with enough oil
Best for bowls and hearty lunches with a dipping sauce
Reheat best in a toaster oven or stovetop, but microwaves work too
Example: This Chicken Bacon Ranch Potato Bake includes oven roasted potatoes and reheats well. Add Ranch after reheating!
→ Mashed potatoes
Add butter, milk, or sour cream before storing to seal in moisture
Reheat very gently and stir halfway through
Stovetop, oven, microwave or HotLogic
→ Baked potatoes
Best stored whole if possible (retains most moisture)
Reheats best when cut open and covered
Microwave is a good option
If potatoes tend to dry out for you, it’s usually a fat or moisture issue. I’d say, add some butter or milk when reheating, and maybe some ketchup or Ranch afterwards!
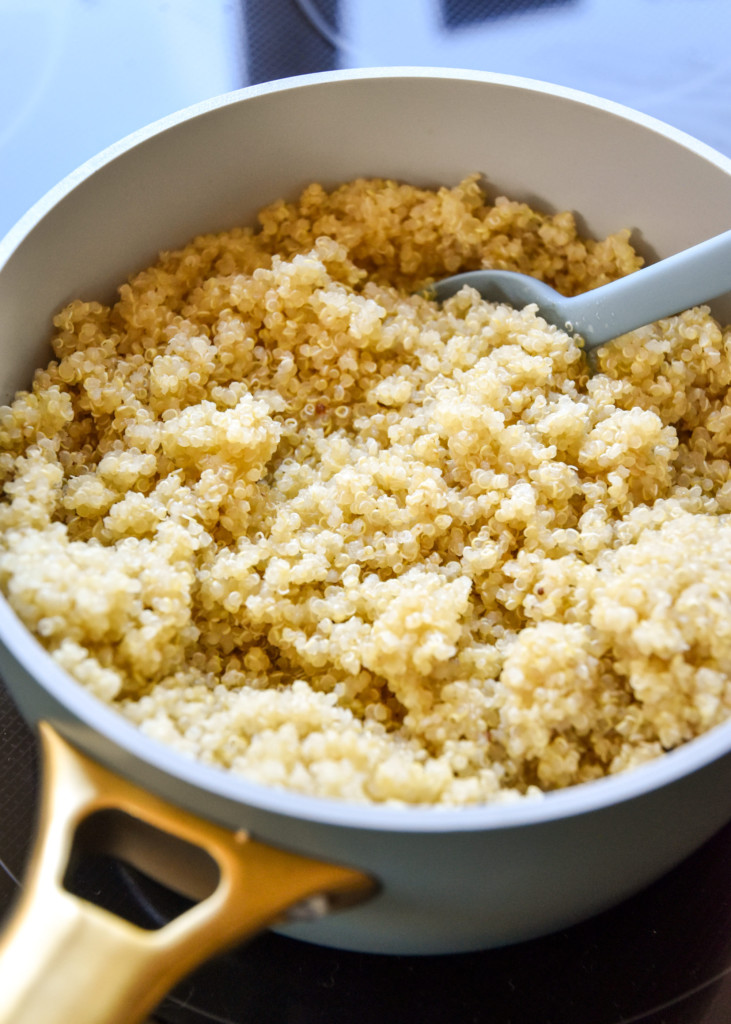
✔️ Other Grains 🌾 (Farro, Barley, Quinoa, Couscous)
Whole grains are an excellent choice for meal prep lunches because they’re naturally sturdy and a bit forgiving.
Grain-by-grain notes:
- Farro & barley: Very reheatable, great for grain bowls
- Quinoa: Reheats best when tossed with oil or a dressing (love my Quinoa “Fried Rice” Bowls!)
- Couscous: Add a splash of water before reheating to re-fluff
Meal Prep Carbohydrate Rules of Thumb
No matter which carbohydrate you’re pairing with your meal prep lunch, these rules of thumb can make a huge difference:
- Slightly undercook carbs during prep (especially pasta)
- Toss with fat before storing: olive oil, butter, or sauce
- Add 1-2 TB water or broth to create steam during reheating
Store separately if:
- The sauce is very liquidy (or soupy)
- You want more control over reheating
Store mixed if:
- The recipe naturally works that way
- There’s enough sauce to protect everything
- It’s a bowl-style or casserole lunch
Getting the carbs right is one of the biggest steps toward meal prep lunches that actually feel filling to eat and are reliable to put together. Your foundation is built! Now, we start building the rest of the lunch…
✨ Section 3: Perfect Meal Prep Proteins (& Which to Avoid!)
If carbs are the foundation of a reheatable lunch, protein is next.
Let’s call protein the ‘walls’ of the meal prep lunch. They’re the backbone of the meal, the powerhouse, what your body uses to perform all kinds of jobs. Basically, they’re very important!!
The biggest issue? Protein dries out faster than almost anything else, particularly when reheated in a microwave. That can leave you with some serious texture issues.
But some proteins are far more forgiving than others, especially when cooked and stored the right way. If you’re a meal prep beginner, do yourself a favor and start with a protein that doesn’t mind being reheated.
Here’s a summary of which proteins consistently work well for meal prep lunches, and which ones to be more cautious with.
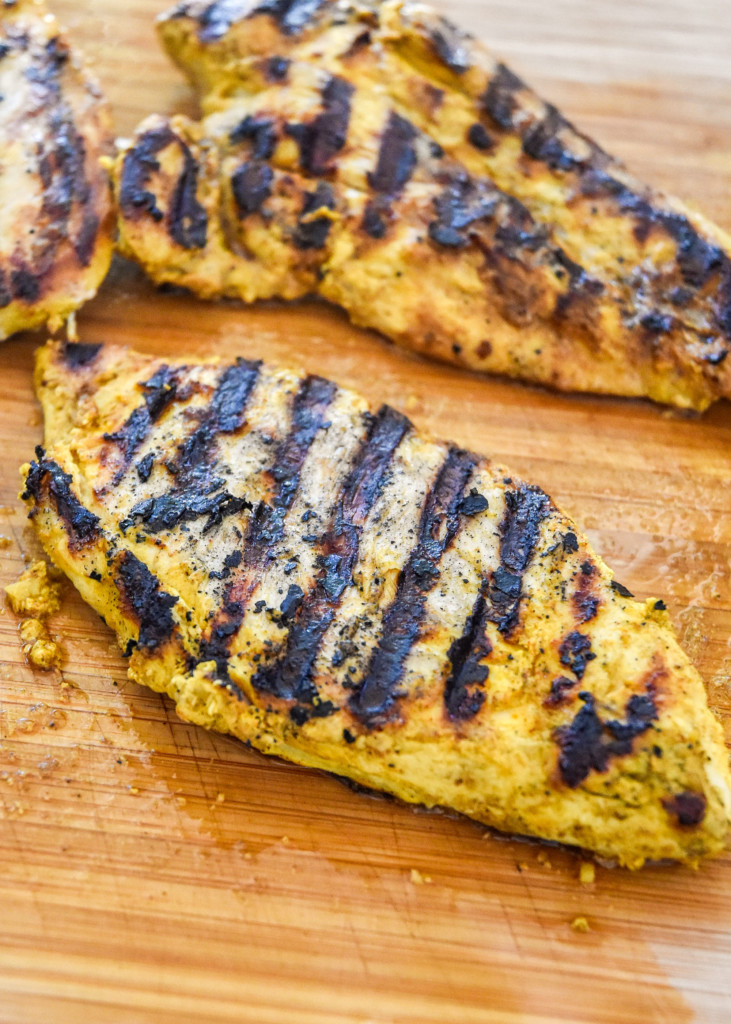
✔️ Chicken
Chicken is hands-down one of the most popular meal prep proteins, and for good reason, when it’s prepared correctly and not overcooked. We do a lot of chicken meal prep here at Project Meal Plan!
Though we do all kinds of chicken meal prep, shredded chicken reheats better than almost any other form because:
- It absorbs sauce like no other
- It’s super versatile and works in so many recipes
- It reheats more evenly than whole meat
- You can usually stir it! (unlike a chunk of meat)
→ White vs. dark meat
Dark meat (thigh) has more fat, stays tender longer and is generally more forgiving. White meat (breast) has less fat, and works best when shredded and/or paired with sauce.
Rule of thumb: Chicken shouldn’t be reheated when totally dry. At the very least, add some water or broth, and enjoy it with a sauce or dressing.
Even a small amount of sauce or broth makes a huge difference in texture. When you’ve got a sauce ready for that chicken, it matters a lot less if it was slightly overcooked or a little bit dry from refrigeration.
✔️ Ground Meats (Beef, Pork, Turkey)
Ground meats are another excellent option for reheatable lunches, especially when fat content is working in your favor. I generally opt for higher fat ground meat options when meal prepping.

The key is cooking ground meat just until done, then pairing it with sauce, veggies, or grains before portioning and storing for meal prep lunches.
Why ground meat works well:
- Smaller pieces are stirrable and reheat more evenly
- Fat retains and distributes moisture throughout the dish
- It pairs naturally with lots of sauce profiles
Fat content matters:
Lean ground turkey can dry out quickly if overcooked
Ground beef (or slightly higher-fat turkey) tends to stay juicier
✔️ Braised or Slow-Cooked Meats
If a protein was cooked low and slow, it’s already halfway there! Just by the nature of the recipe, there is a cooking liquid involved. You should also try to include some of this cooking liquid in the storage container as well.
Think shredded beef, pulled pork, or slow-cooked chicken thighs. These proteins automatically include moisture, improve after a day or two in the fridge, and always reheat well.
Why these proteins work so well:
- Long cooking breaks down tissues
- Moist heat keeps proteins tender
- They’re usually stored with liquid or sauce
✔️ Chickpeas, Tofu & Tempeh (With Sauce)
Plant-based proteins can be more reheatable than meat, as long as expectations are realistic.
→ Chickpeas (and beans) – This is the vegetarian protein I have the most experience with. We have some delicious chickpea recipes here at PMP, some for reheating, and some not! (Herby Lemon Mashed Chickpeas anyone?!)
Here’s why I like to use chickpeas when making vegetarian meal prep lunches:
- Texture doesn’t change much after time in the fridge
- Hold their structure when reheated
- Versatile and adaptable to many flavors

→ Tofu & tempeh – We don’t have any meal prep recipes with these ingredients (yet!), but that doesn’t mean they can’t be part of your meal prep lunch.
If you’re looking for more tofu and tempeh recipes, browse the food blog Food With Feeling. Brita is an expert in this area!
Here are some things to note about reheating tofu and tempeh:
- Texture will change slightly after reheating (this is normal)
- Best in saucy dishes or grain bowls
- Avoid reheating them completely dry (sauce it up!)
✔️ Proteins to Be Cautious With
Some proteins can work for meal prep, but they require a little more attention. Some others are best avoided altogether, and won’t taste great when reheat unless very specific criteria are met. Here are some examples:
→ Lean chicken breast (cubed):
Dries out easily (low fat content)
Doesn’t reheat evenly
Works best when shredded or heavily sauced
→ Fish (with a few exceptions):
Delicate fish tends to overcook when reheated
Strong odors can be a dealbreaker at work
Exceptions: some fish does well cold, like tuna or salmon
→ Overcooked eggs:
Rubbery texture after reheating
Best used in breakfast prep or eaten cold
Slightly undercook on prep day
If a protein is already borderline dry when freshly cooked, it’s very unlikely to improve after reheating. Serve cold, if that’s an option!
TLDR: Choose Proteins That Forgive You
The best meal prep lunches use proteins that:
- Contain fat or moisture
- Are paired with sauce
- Reheat evenly
When in doubt, choose shredded, ground, braised, or saucy proteins. Definitely skip anything that relies on being perfectly cooked to stay tender. You may find yourself disappointed on reheating day!
✨ Section 4: Vegetables: What to Roast, Steam, or Keep Raw
What’s a house without furniture?
Once you’ve chosen the foundation (your carbs) and put up the walls (your protein), vegetables (or other produce!) are where your meal prep lunch really comes to life, so let’s say it’s the furniture.
The vegetables you choose and how you prepare them both matter, but it’s flexible. This is your furniture, your landscaping, your chance to add color, texture, and personality.
How can you change up the veggies in a meal prep lunch, you ask?
- Maybe it’s roasted veggies mixed right into the bowl.
- Maybe it’s crunchy raw vegetables on the side.
- Maybe it’s something pickled, marinated, or lightly dressed.
This is the most customizable part of your meal prep lunch. But not all vegetables belong in a reheated meal, just like not all furniture belongs in a house.
(A tire swing in the living room? No. A hot soggy cucumber reheated in a rice bowl? Also no.) Let’s break it down.
✔️ Vegetables That Generally Reheat Best
Some vegetables are more flexible than others. They work whether mixed into the meal, or stored separately; whether reheated or not. Feel free to get creative with these.
Remember, don’t overcook on prep day. Reheat gently, don’t blast on high! That’s probably the biggest make or break thing when it comes to meal prepped veggies.
→ Examples of dependable veggies:
- Legumes like green beans, snap peas, chickpeas and corn 🫛
- Most root vegetables, like carrots & squash 🥕
- Onions and peppers can be sautéed or roasted 🫑
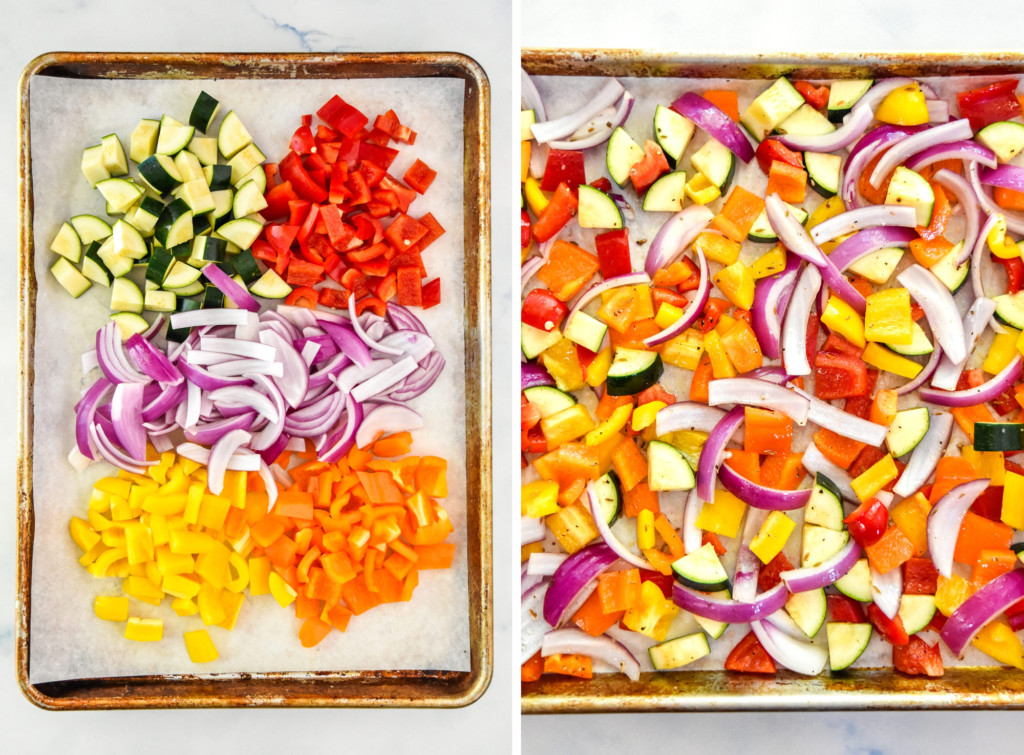
✔️ Why Roasting Works
Roasting is one of the safest bets for meal prep lunches. It removes excess moisture, concentrates flavor, and creates cooked vegetables that can handle a second round of heat. This is your sturdy furniture!
♨️ Consistently reliable options for roasting:
- Broccoli, cauliflower
- Carrots (and other root veg)
- Brussels sprouts
- Bell peppers and onions (I like roasting red onions!)
- Mushrooms (most moisture evaporates)
→ Why these work:
- Lower water content (or moisture cooks off during roasting)
- Natural sugars caramelize, improving flavor after reheating
- They tend to hold their structure instead of collapsing into mush
✔️ Produce That’s Better Added After Reheating
Some vegetables don’t want to be heated at all, and that’s okay. We could treat these as side furniture instead of built-in fixtures, just for funsies). Add them after reheating!!
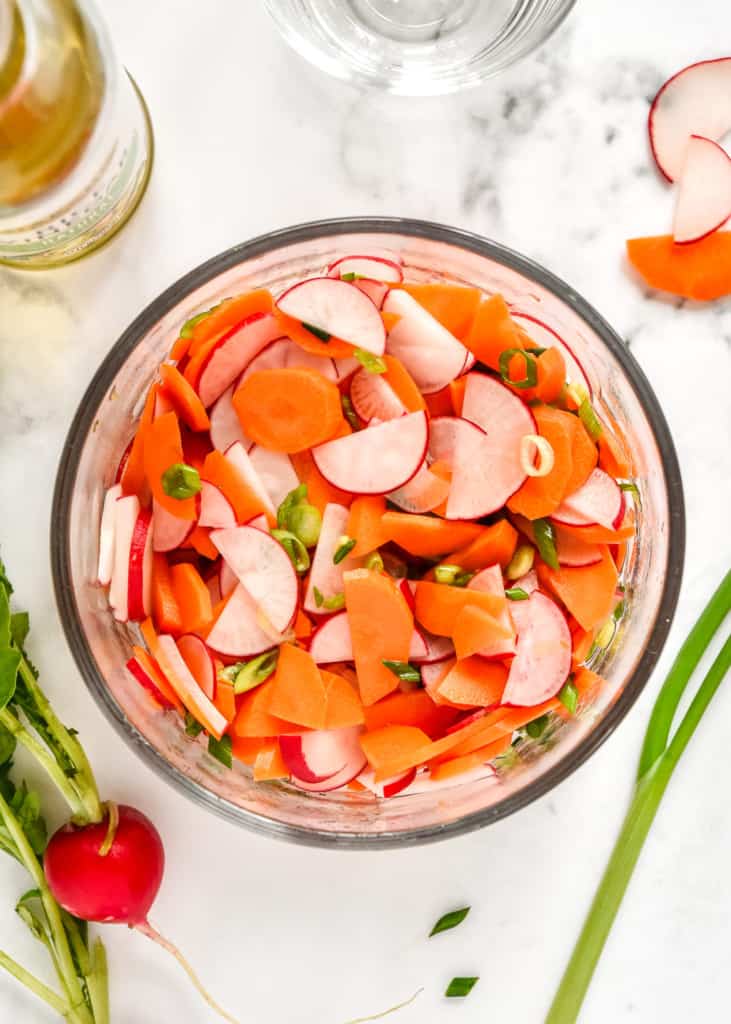
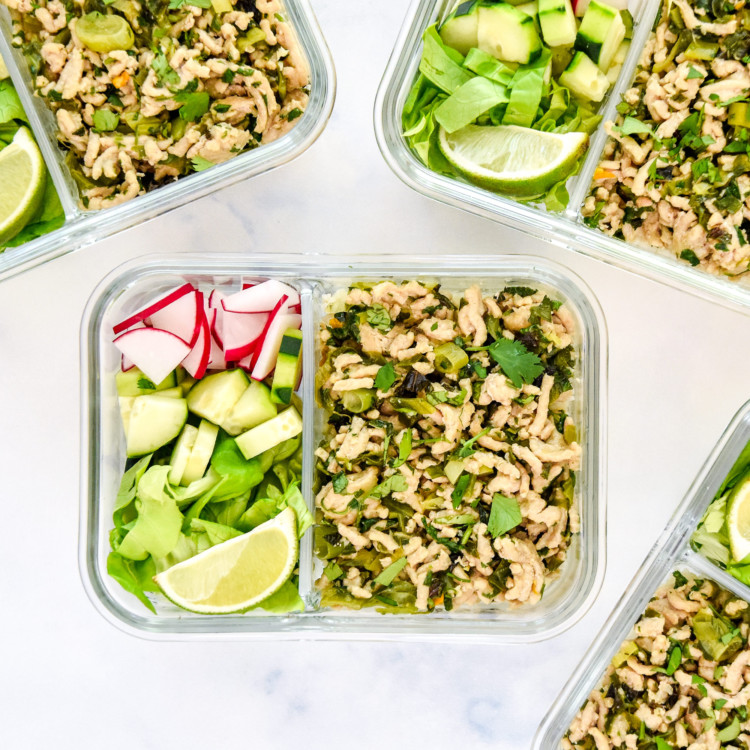
Pickled veggies kept on the side!
→ These are best kept separate and added fresh:
- Spinach, arugula, mixed greens and shredded lettuce (nobody likes hot lettuce)
- Cucumbers
- Avocados (I also don’t like hot avocado!)
- Fresh herbs, especially soft herbs like cilantro
- Anything you want to keep raw (uncooked)
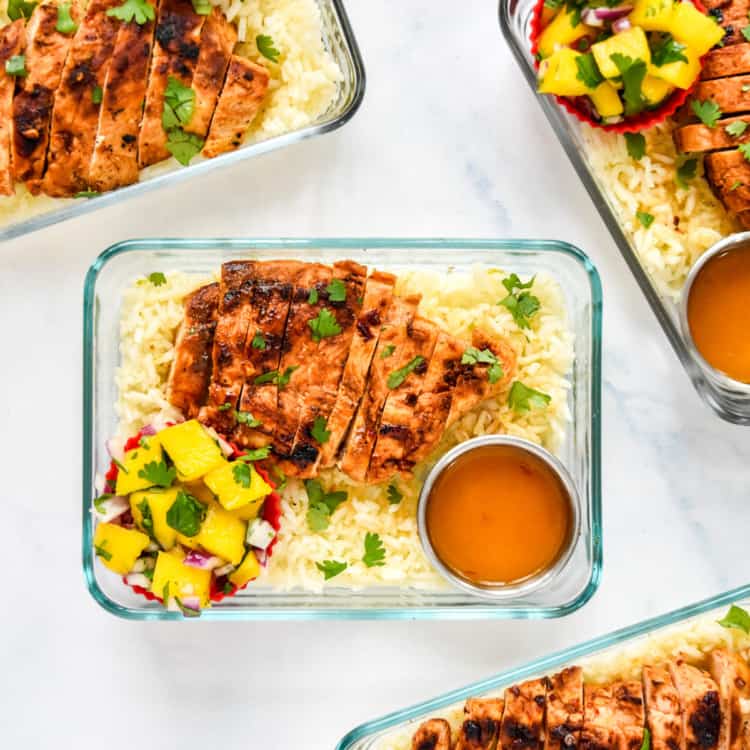
- Other produce mixtures like this mango salsa or pickled veggies
→ Why? Because:
- They wilt quickly
- Heat destroys their texture
- They’re meant to be crisp and fresh
Add these after reheating for best texture. You’ll notice a few meal prep lunches on Project Meal Plan follow this rule and store some veggies separately. This is on purpose!
→ Store ingredients so they are easy to separate when reheating. This means:
- store in another container
- use salad dressing containers (affiliate link!)
- or Reusable Silicone Baking Cups (affiliate link!)
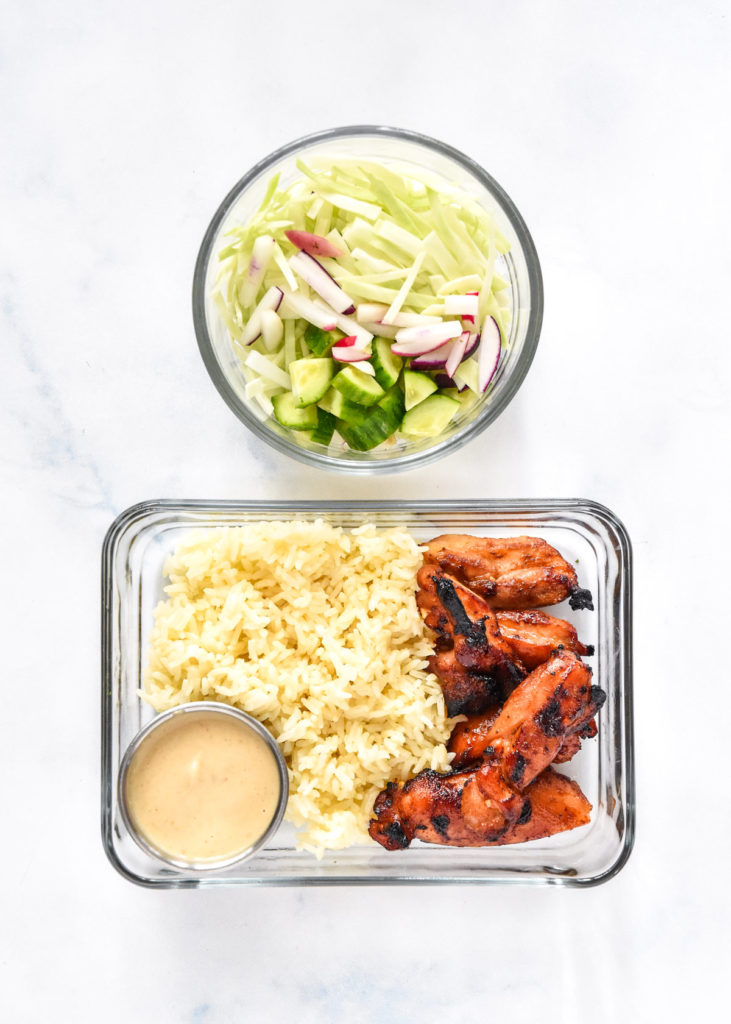
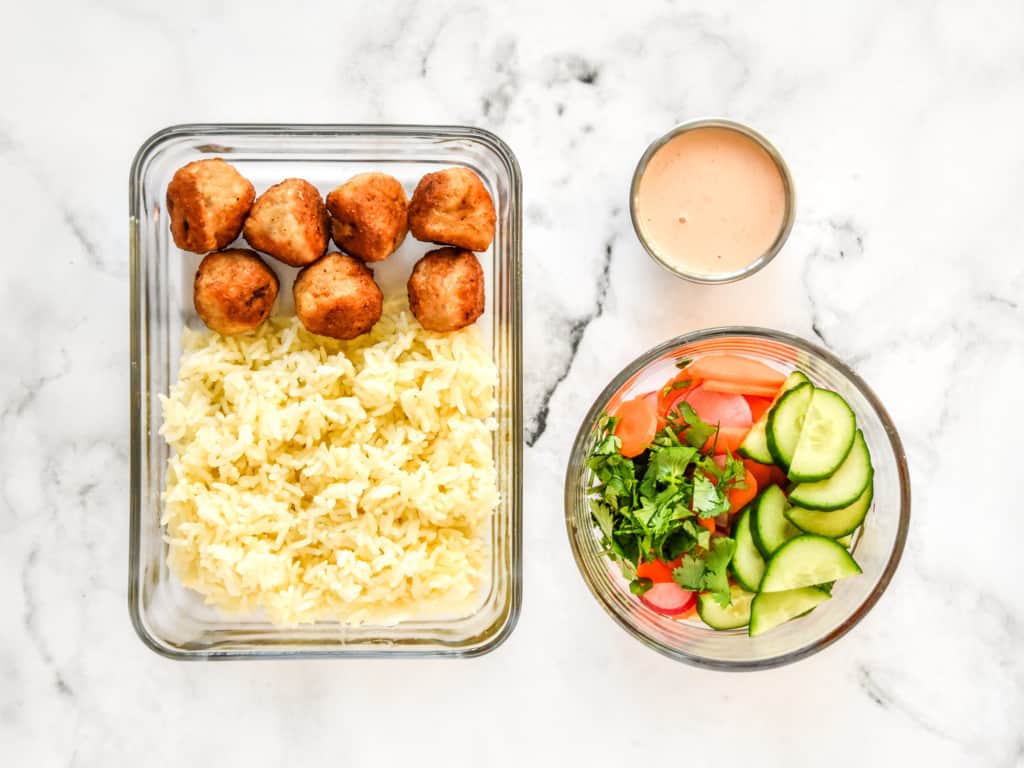
to store and easily remove before reheating. You can see an example with the mango salsa and dressing ⬇️

✔️ Meal Prep Vegetable Rules
- Roast vegetables instead of steaming when possible
- Slightly undercook vegetables on prep day
- Store high-moisture vegetables separately
- Add fresh greens, cucumbers, avocado after reheating
✨ Section 5: Sauces, Dressings, and Moisture Boosters (Decor & Insurance)
The final piece of your meal prep lunch “house” is sauce or dressing.
If carbs are the foundation, protein is the walls, and vegetables are the furniture, then sauce is the decor. The part that makes the space feel finished, intentional, and all yours.

Sauce does more than make things taste good. Sauce is insurance for meal prep lunches. It protects your food from drying out, helps everything reheat more evenly, and keeps lunches tasting fresh by day three or four.
✔️ Why Sauce Matters So Much For Reheating
Most reheating problems come down to one issue: lost moisture. But we can fix that! By adding some moisture in the form of a dressing or sauce.
A good sauce:
- Provides moisture and steam during reheating
- Coats proteins so they stay tender
- Prevents rice and grains from turning dry or chalky
- Makes leftovers taste intentional, not sad
Even a simple moisture booster, like a squeeze of lemon juice or a drizzle of olive oil, can completely change how a meal tastes after reheating, for the better of course!
✔️ When to Mix Sauce In vs Store It Separately
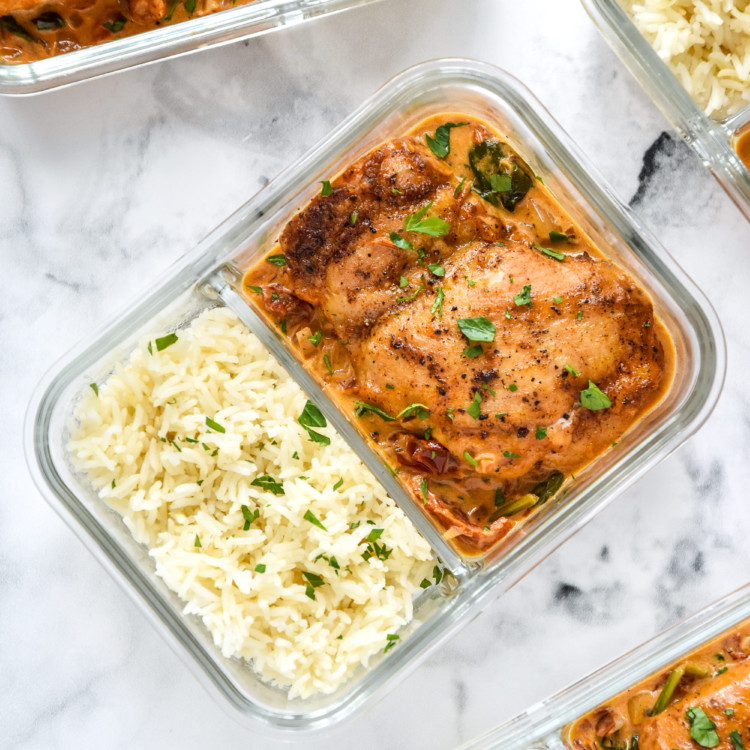
If the sauce is already mixed into the recipe during cooking, like with this Zucchini Chickpea Curry, then you’re done! However, if the sauce is sitting there and you’re wondering what to do, here are some rules of thumb:
→ Mix Sauce In Before Storing When:
- The meal is meant to be reheated as one unit
- The sauce is heat-stable
- You want the flavors to soak in
Examples:
- Tomato-based sauces or pasta sauce
- Curry sauces 🥘
- Teriyaki or soy-based sauces, bottled or homemade
- Creamy sauces made with dairy or dairy alternatives (reheated gently, these can work!)
These sauces protect the meal during storage and reheating.
→ Store Sauce Separately When:
- The sauce is oil- or vinegar-forward
- The meal includes fresh vegetables or greens
- You want contrasting textures ⚖️
Examples:
- Vinaigrettes
- Citrus-forward dressings
- Yogurt-based sauces
- Creamy cold sauces
Adding these after reheating keeps flavors bright and prevents sogginess.

✔️ Simple Moisture Boosters That Count as “Sauce”
You don’t need a complicated recipe for sauce to do its job. These tiny additions can save an otherwise dry lunch! Sometimes your “sauce” insurance might look like:
- A drizzle of olive oil
- A squeeze of lemon or lime after heating
- A drizzle of broth before reheating
- A splash of pasta water or protein cooking liquid
The Saucy Takeaway 💞
The analogy continues: sauce is what ties the whole house together!!
- It protects your investment
- It improves reheating
- It keeps meals exciting all week
→ If your lunches keep drying out, don’t just scrap the entire recipe. Try adding better insurance.
Check out The Dressing Directory for meal ideas based on various sauces and dressings!

✨ Section 6: Containers Matter More Than You Think
You could craft the perfect lunch and still end up with a disappointing meal if your container works against you. Let’s say your container is the frame of the house.
The container affects how evenly food reheats, how much moisture escapes, and whether your lunch survives the commute. Here’s what actually matters when it comes to containers.
✔️ How Container Shape Affects Reheating
If food is piled too high or too thick, the outside/edges overheat before the middle warms through. Here’s how container shape affects reheating:
- Wide, shallow containers reheat more evenly
- Deep containers trap cold spots in the center
- Square or rectangular shapes beat tall, round ones
✔️ Glass vs Plastic Containers 🌀
There are definitely some pros and cons to various container materials. Generally the options are glass (with a plastic based lid) or 100% plastic. If you’re reheating regularly, glass wins in my opinion!
→ Glass containers:
- Reheat more evenly
- Don’t absorb odors or stains
- Can go from fridge to microwave or oven
- Are better for the environment
→ Plastic Containers:
- Lighter for commuting
- Reheat less evenly
- More likely to warp
- More likely to absorb colors and smells
✔️ Venting Steam (This One’s Big!!)
- Trapped steam = soggy vegetables + rubbery proteins (and a possible explosion 💥)
- Always vent the lid slightly when microwaving:
- With a built-in vent hole in the container (some have this feature)
- Or by setting the lid on top of the meal to loosely cover but let steam escape 💨
Controlled steam = better textures overall.
✔️ Commuting Considerations
If your lunch is traveling with you: 🚗
- Leak-resistant lids matter more than aesthetics (okay this is obvious but worth mentioning)
- Weight adds up (especially with glass)
- Consider if anything can be left at work (like a bottle of dressing in the work fridge?)
Sometimes the best container is simply the one that doesn’t spill in your bag 🙅♀️
Your container isn’t just storage. It affects the reheating process and can make a huge difference in your enjoyment of the meal.
✨ Section 7: Reheating Meal Prep Lunches (By Method)
In an ideal world, you’d reheat food using the same method it was originally cooked. But let’s be real: most of us are reheating lunches at work. Maybe at home if that’s where we’re able to work.
That usually means a microwave… maybe a toaster oven. Probably not a full stovetop. If you’re able to reheat at all! (Find my best no-reheat lunches here if you’re looking for those!)
The good news? 📰 You don’t need perfect equipment. Just do your best to match the meal prep lunch with the reheat option that works for you.
Below, I’ll walk you through the most common reheating methods, along with what each method does best and how to use it without turning a great meal prep lunch into sad leftovers.
Exact amount of time to reheat will vary with the amount and type of food you’re reheating.
Four Common Reheating Methods:
| Best For: | Tips: | |
|---|---|---|
| Microwave (Most Common) | Rice bowls, pasta, shredded meats, saucy dishes, soup. Avoid crisp foods. | Add 1–2 TB liquid, loosely cover, heat for 1-2 min, stir every 30 sec, ~2 min total |
| Stovetop (or for WFH) | Stir-fries, seafood, anything with crisp edges, ground meat dishes, curries, soups | Use low heat, add liquid gradually if needed, cover to trap steam, stir often, ~10-15 min total |
| Toaster Oven / Air Fryer | Roasted veggies, crisp/fried food, sheet-pan meals, hot sandwiches, mini pizzas/flatbreads | Cover loosely with foil, finish uncovered, watch closely, ~5-15 min depending on thickness |
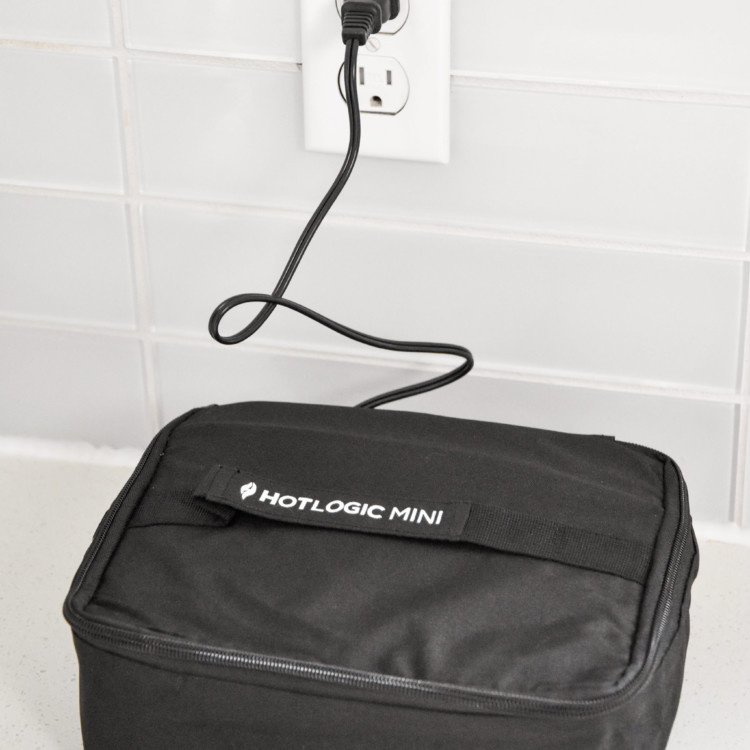
| HotLogic / Heated Lunch Box | Moist fully cooked meals, rice bowls, pasta, ground meat dishes, soups. Avoid crisp foods. | Plan ahead (slow heat takes at least 90 minutes), always add liquid! |
→ For a deep dive into why certain foods reheat better than others, read 10 Foods That Make The Best Leftovers, where I talk all about which types of food make the best leftovers, how long leftovers last, and how to make them as good as day one.
⏱️ Quick revive techniques:
You don’t have to eat pre-made lunches and leftovers exactly how they were before. Do whatever you need to do to liven them up so they’re more appealing to you! It’s a quick win! 🏆
Here are some ideas to quickly revive your meal prep lunch:
- 🥜 add something crunchy – depending on your meal, add something crunchy on top, such as nuts, chips, seeds, crunchy veggies, etc. A new texture can totally change the dish.
- 🥗 add some color – colorful ingredients are usually fresh and delicious, so this is a great way to transform your lunch into a fresh feeling meal. Add some fresh veggies or fresh greens to a dish to change it up.
- 🍋🟩 add some acid – even something as small as a squirt of lime juice or lemon juice can bring a meal to life! Great for soups, burrito bowls, and rice bowls.
✨ Section 8: Example Lunches That Reheat Well
We’ve got a variety of meal prep lunches at Project Meal Plan, but here are the best ones for reheating. Browse this short list of options if you’re looking for a new meal prep lunch to try.
Add a drizzle of water to the broth and then reheat in your favorite method. Add extras like guacamole or salsa after reheating.

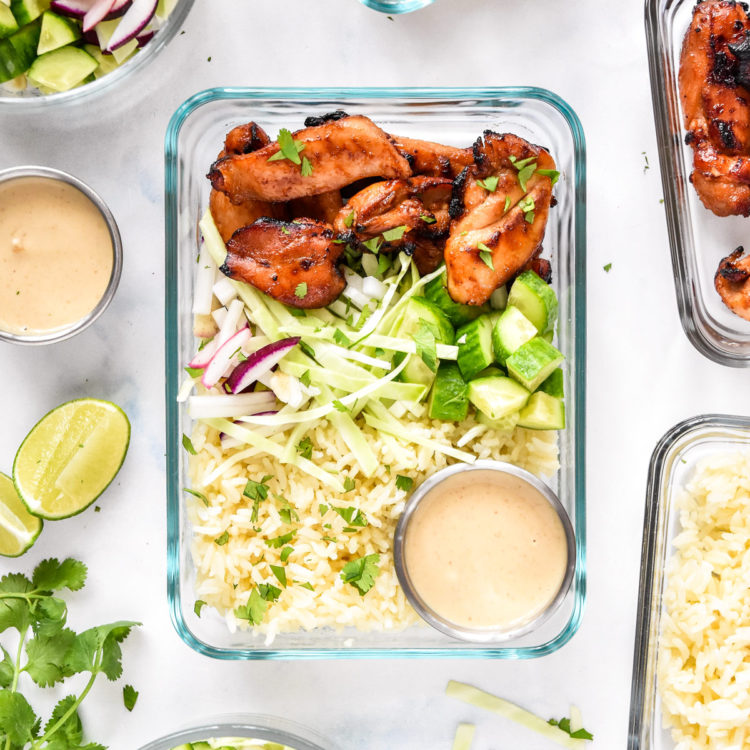
Be sure to keep your creamy cucumber raita on the side or in a dressing container so you can easily take it out before reheating. Sprinkle a bit of water or broth over the entire meal before reheating in your favorite method.

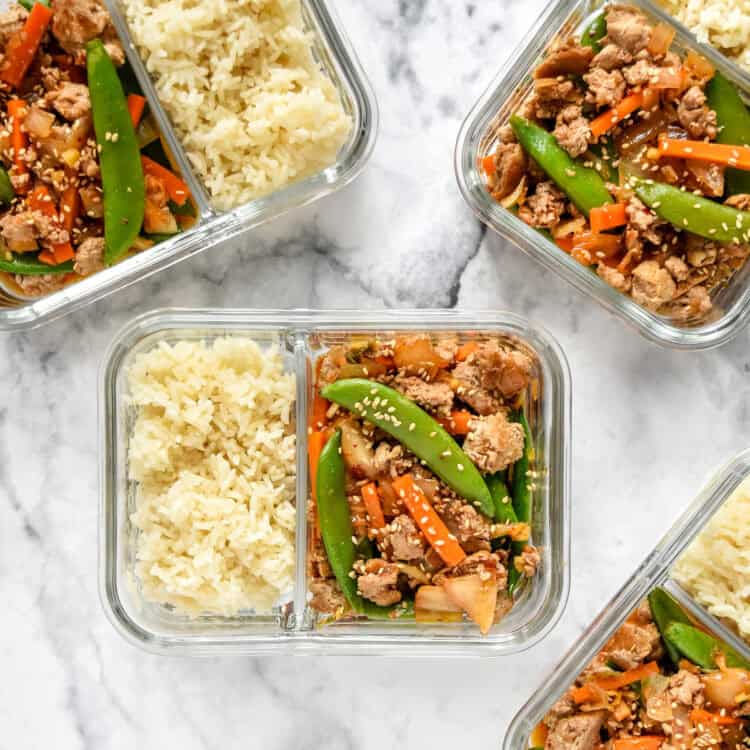
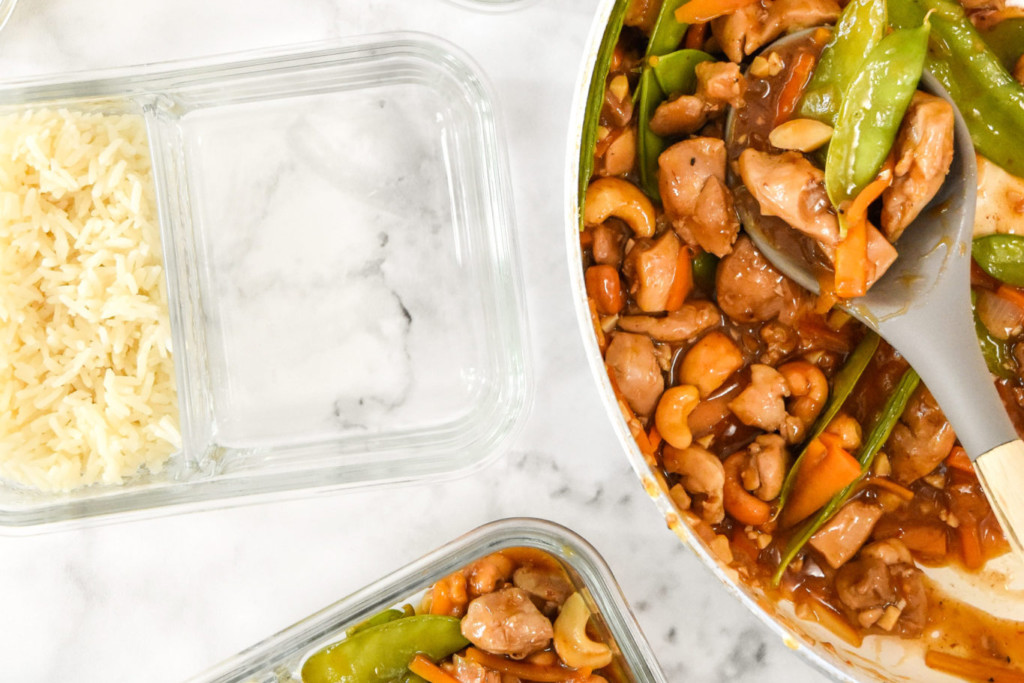
All you have to do is drizzle some water over the rice before reheating. The saucy main dish will take care of the rest of the moisture! Great in the microwave or HotLogic Mini Oven.
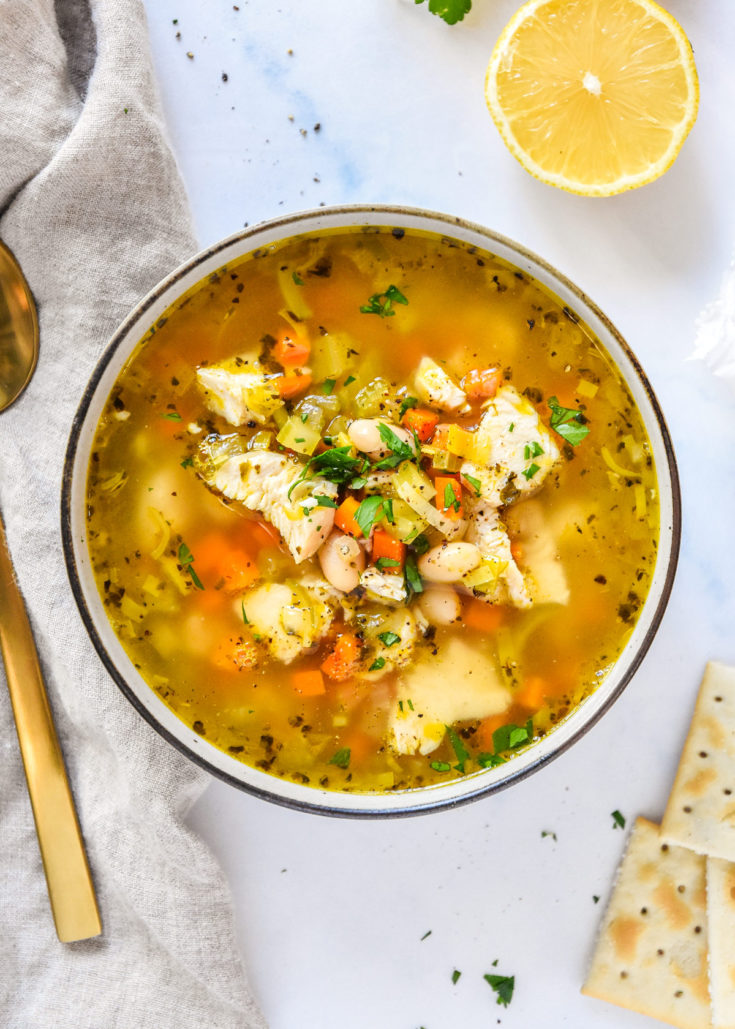
I didn't talk much about soups in this article, but they're always a great option for reheating. No need to add extra liquid; it's all included in the meal!

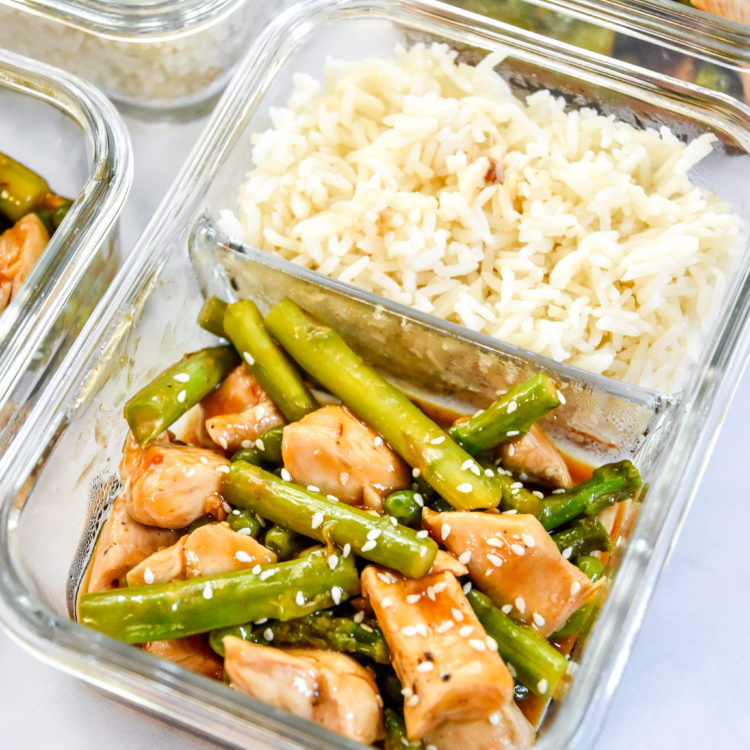
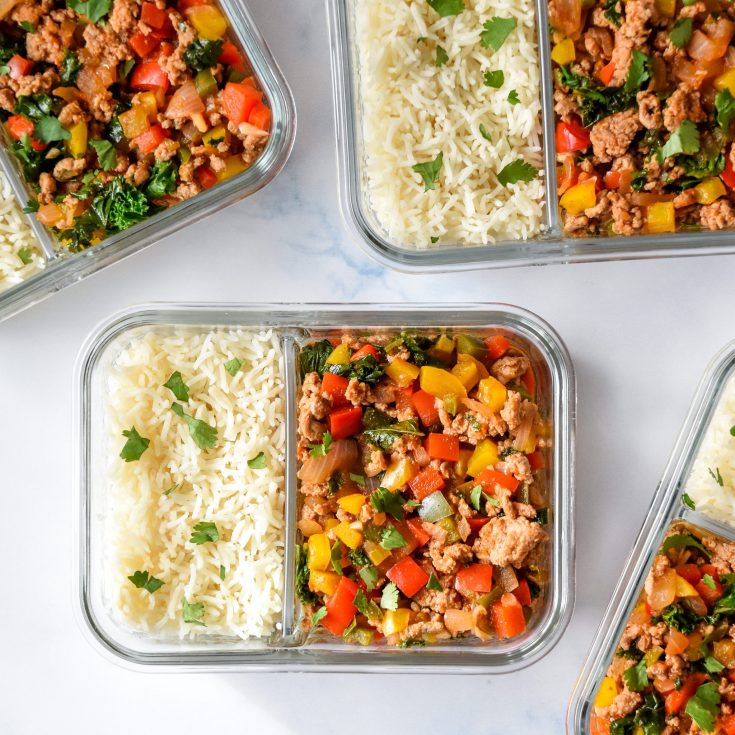
This is one where the meat used has a good amount of fat to keep it moist without adding any sauce. Maybe a spritz of water over both the main and the rice would help. but otherwise, this one should reheat easily.

I would drizzle some water over the whole meal, but at least the rice! Otherwise, the stir fry has a decent amount of sauce. It's always good to help out the rice with some water to make steam, but that's all you need to do for this one.

✨ Section 9: Common Meal Prep Reheating Mistakes (& Easy Fixes)
Meal prep lunches aren’t about making a picture perfect lunch every day. It’s about finding meal prep lunch recipes (or templates) that work for you.
If something didn’t reheat well this week, it doesn’t mean you “failed.” It means you learned something for next time.
Continuing with our analogy: Think of it like a house 🏠. If something cracks or leaks, you don’t tear the whole thing down. You only need to fix the one part that requires attention.
Same with meal prep lunches. If one component doesn’t work well, work on a fix for only that part. The other parts of the meal may work well in other food scenarios.
🔨 Common lunch reheating mistakes (and fixes):
‼️ Overcooking during prep
✅ Fix: Make sure you use a timer so you can slightly undercook proteins, pasta, and veggies. Then they won’t overcook when reheated.
‼️ Dry, crunchy rice or dry proteins
✅ Fix: Add 1–2 tablespoons of water, broth, or sauce and loosely cover to create steam when reheating.
‼️ Soggy lettuce or a sauce that separates in the microwave
✅ Fix: Sounds like you need to store components more intentionally; especially sauces and dressings. Any small side container will help.
‼️ Icy middles and hot edges when you reheat
✅ Fix: You may be using the wrong shape container. Choose shallow, microwave-safe containers that heat evenly and allow steam to escape.
Build lunches that work with you, not against you! 💖
Once you understand how each part of your meal prep lunch behaves, it gets easier and tastier every single week.
It’s not just being lucky in the kitchen or expensive gadgets. It’s a skill you can actually learn! 🧑🍳 When you cook and store lunches with reheating in mind, you end up with meals that:
- Stay moist and retain textures
- Heat evenly and create steam
- Actually taste like something you want to eat!
If you want to keep building better meal prep lunches, here are a few great places to go next:
Every week you meal prep your lunch, you’ll get better at it. I promise! And with the right building blocks, your lunches don’t just save you time. They make your co-workers a little bit jealous!


Leave a Comment