This post may contain affiliate links. Please read our disclosure policy.
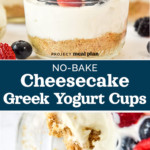

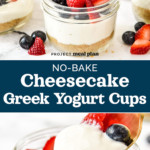
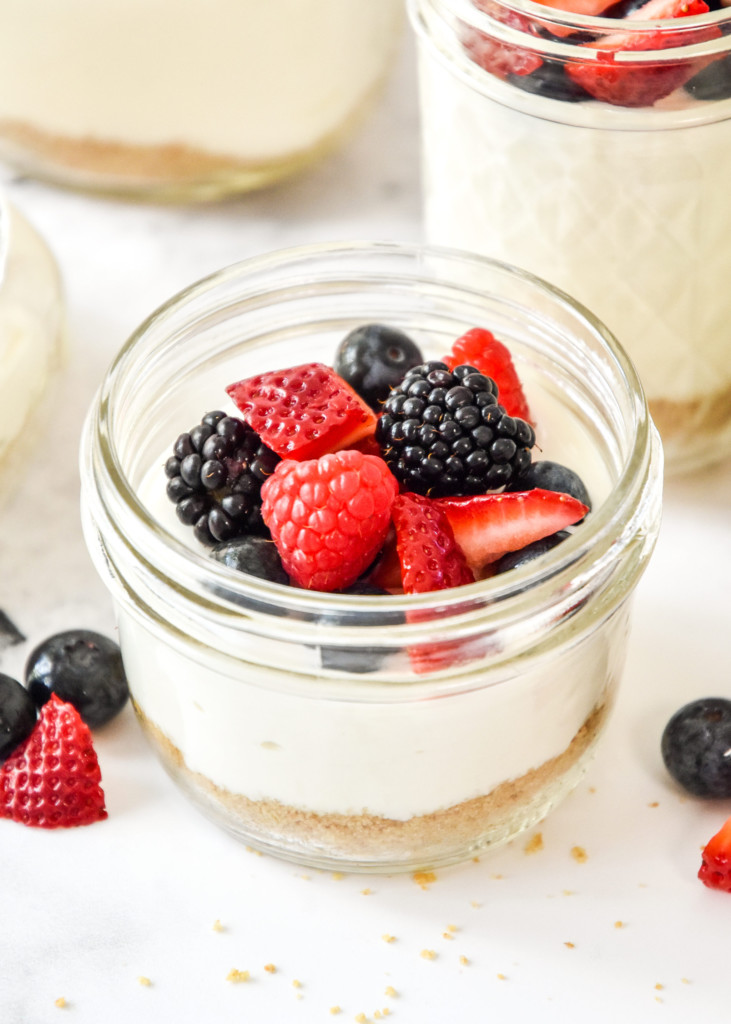
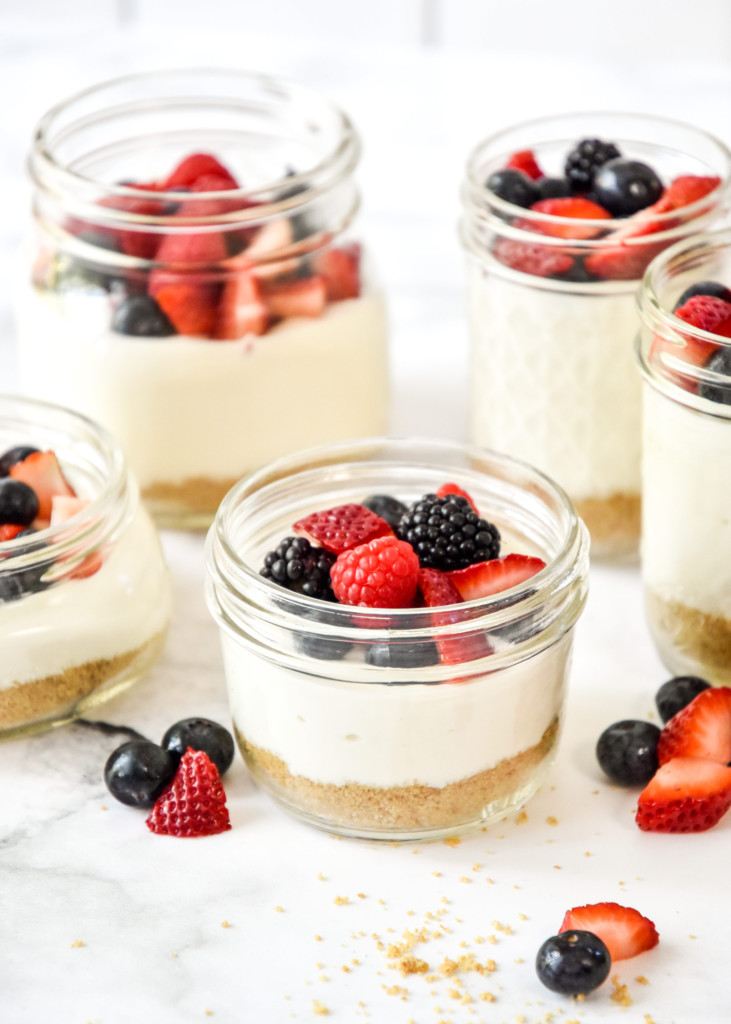
These No-Bake Cheesecake Greek Yogurt Cups feature a classic graham cracker base, topped with homemade cheesecake flavored Greek yogurt filling. Portion into mason jars for make-ahead friendly single serve desserts anytime!
Note from Danielle
Cheesecake is one of the all-time greatest desserts, you can’t change my mind. I love cheesecake so much, one time I made a cheesecake and put it into a layer cake.
Yes, you read that correctly. A whole cheesecake as the middle layer of a 3-layer cake. Best thing ever. But of course, we can’t make cheesecake layer cakes every day, so that’s where these No-Bake Cheesecake Greek Yogurt Cups come in.
There’s definitely more yogurt than cheesecake going on here – honestly, if you wanted to eat this for breakfast, that’s completely okay with me. In fact, encouraged!! Breakfast, dessert, or snack, I think you’ll enjoy these cheesecake yogurt cups any time of the day.
By the way – here in the post content, you’ll find detailed information on the ingredients used, possible substitutions, and helpful tips for successful results based on my experience with this recipe.
For the printable recipe card with a list of ingredients followed by concise instructions, keep scrolling down or hit the ‘Jump to Recipe’ button at the top of the page. Frequently asked questions are located below the recipe card.

Recipe Overview
Total Time: 20 minutes
Difficulty: Easy
Method: No Heat
Prep: 5 Ingredients or Less
Watch how to make these No-Bake Cheesecake Greek Yogurt Cups (2 minutes):
What are the ingredients in these No-Bake Cheesecake Greek Yogurt Cups?
The ingredients used in this recipe are fairly common – while you may need to pick up a couple fresh dairy items and a lemon, you might already have the rest of the ingredients on hand.
I did my best to develop this recipe using amounts of ingredients that would use up the whole container, or at least not leave anything open. For example, we’re using a whole sleeve of graham crackers instead of a random amount that would leave open packages.
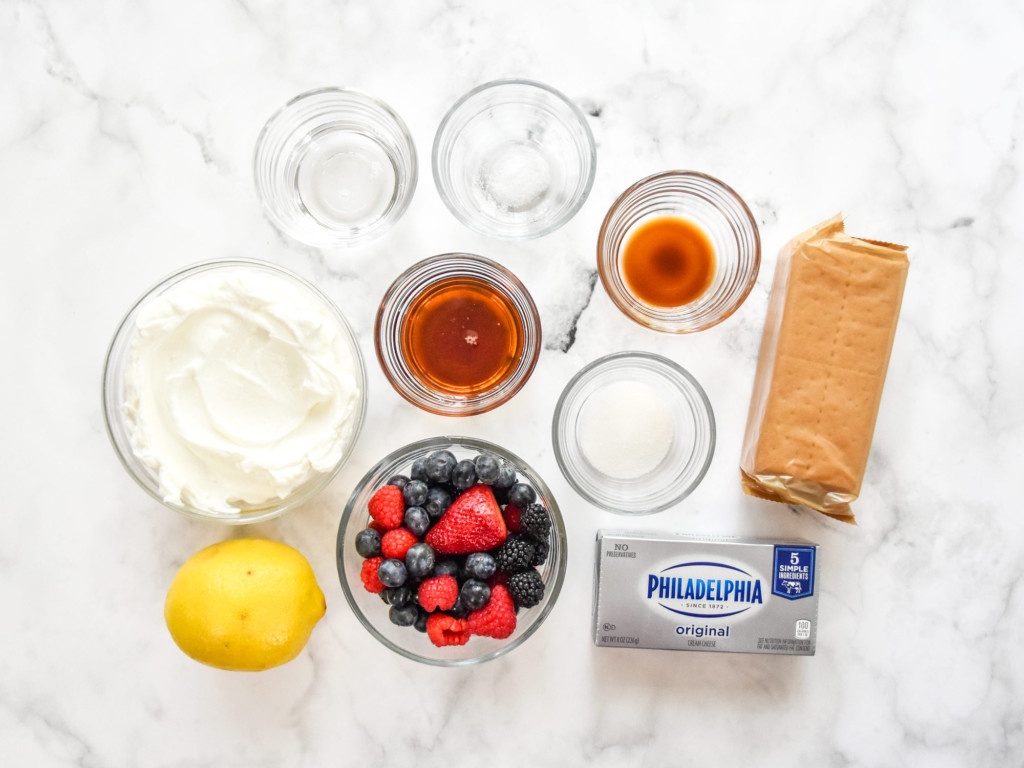
Here’s what I used to make these No-Bake Cheesecake Greek Yogurt Cups:
- graham crackers – To make my crust, I used one whole sleeve of graham crackers, which for most brands, contains nine crackers. This end up being the perfect amount to make a crust for five little servings!
- granulated sugar – To lightly sweeten the crust, I added just one tablespoon of granulated sugar. White or brown will work here, whatever you have!
- coconut oil – You can use butter or coconut oil here. Butter lends a delicious flavor, but I actually liked how the coconut oil held the crust together. There is a very slight coconut taste, but I really like it!
- cream cheese – All you need is one brick of cream cheese! No more and no less. I prefer to go with the regular full fat kind. More fat = creamier final result.
- pure maple syrup – As the sweetener for the filling, I used real maple syrup. I love the subtle maple flavor it brings, and the sweetness level is perfect.
- lemon juice – In order to get that tart, cheesecake style, bite of flavor, lemon juice is required. Go ahead and juice the entire lemon – no halves or quarters to save.
- vanilla extract & salt – These two items are basic but so important for flavoring the final product. Vanilla is a background flavor – it’s the kind of thing you don’t specifically pick out when it’s there. But if it was missing? You’d notice. Same with the salt, which balances all these sweet flavors together.
- plain Greek yogurt – Go for a thicker brand like Fage! You can grab a 16 ounce container and use the whole thing in this recipe. Or if you have a larger quantity of yogurt, measure out two heaping cups.
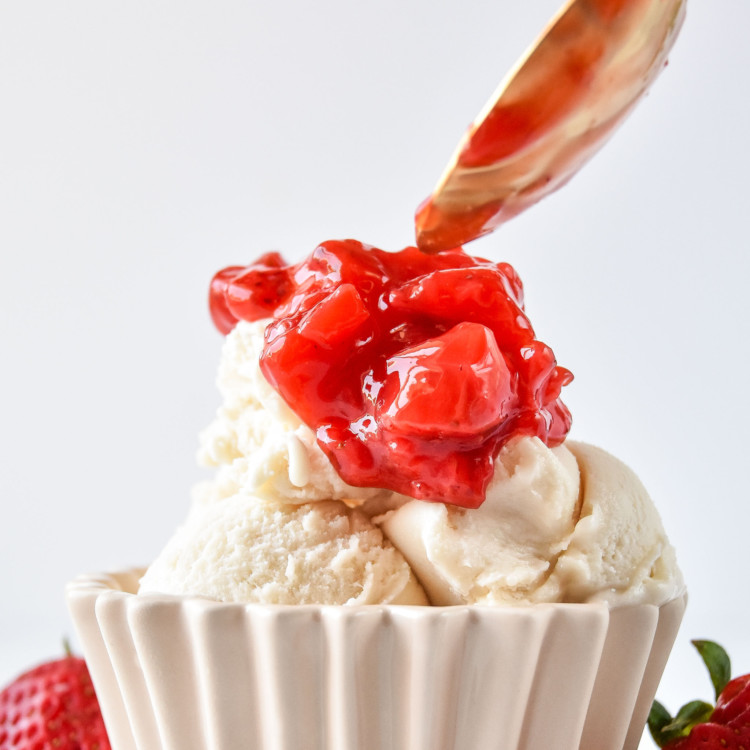
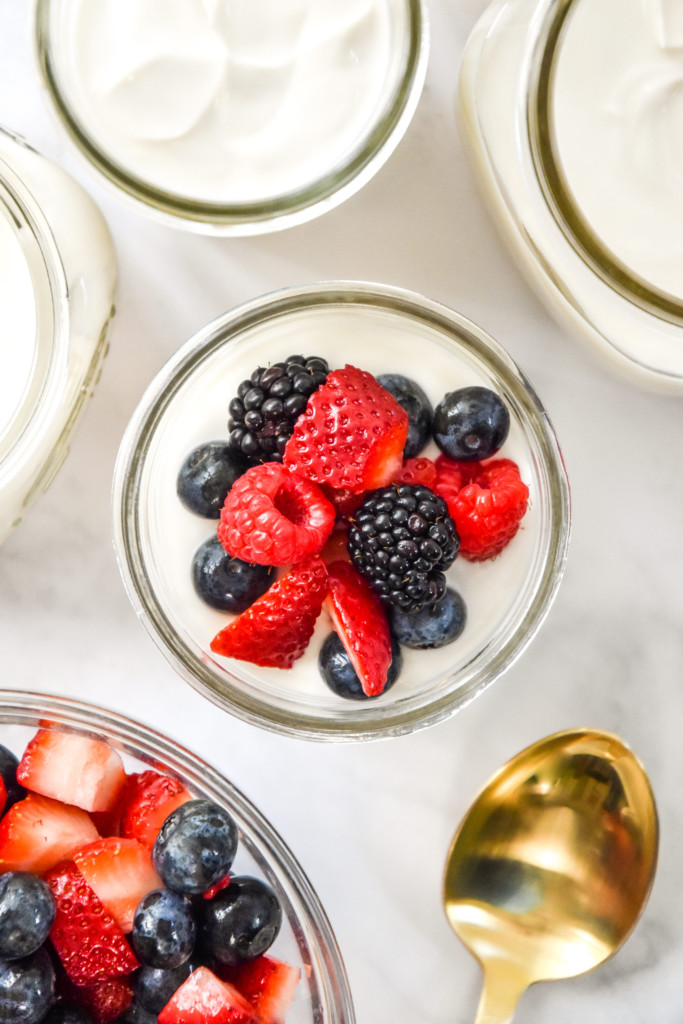
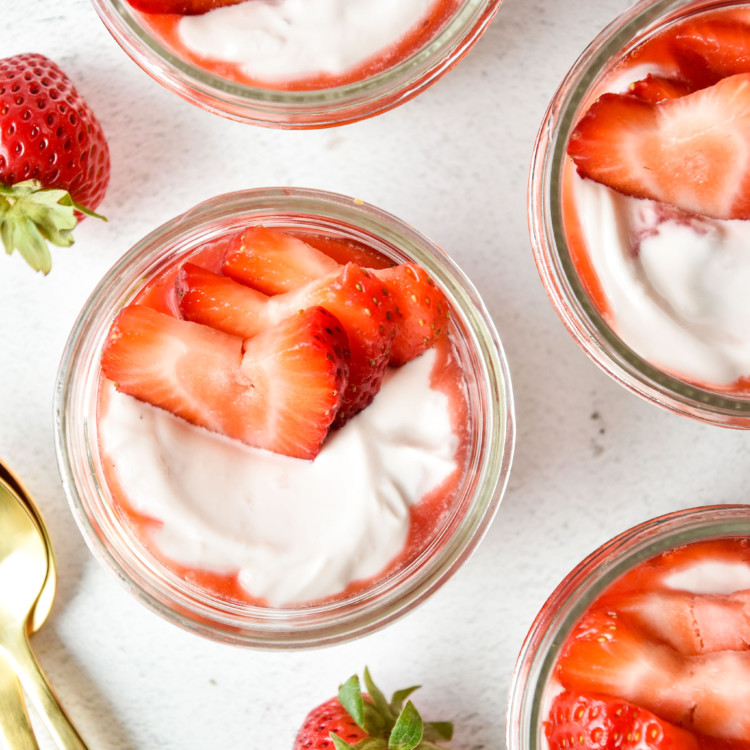
- mixed berries – Use your favorite berries, a combo of all of them, or skip berries completely. My Easy Strawberry Sauce would be perfect to go on top of the yogurt cups!!
How do you make these No-Bake Cheesecake Greek Yogurt Cups?
There are three main steps to making these No-Bake Cheesecake Greek Yogurt Cups: making the crust, making the filling, and then putting it all together.
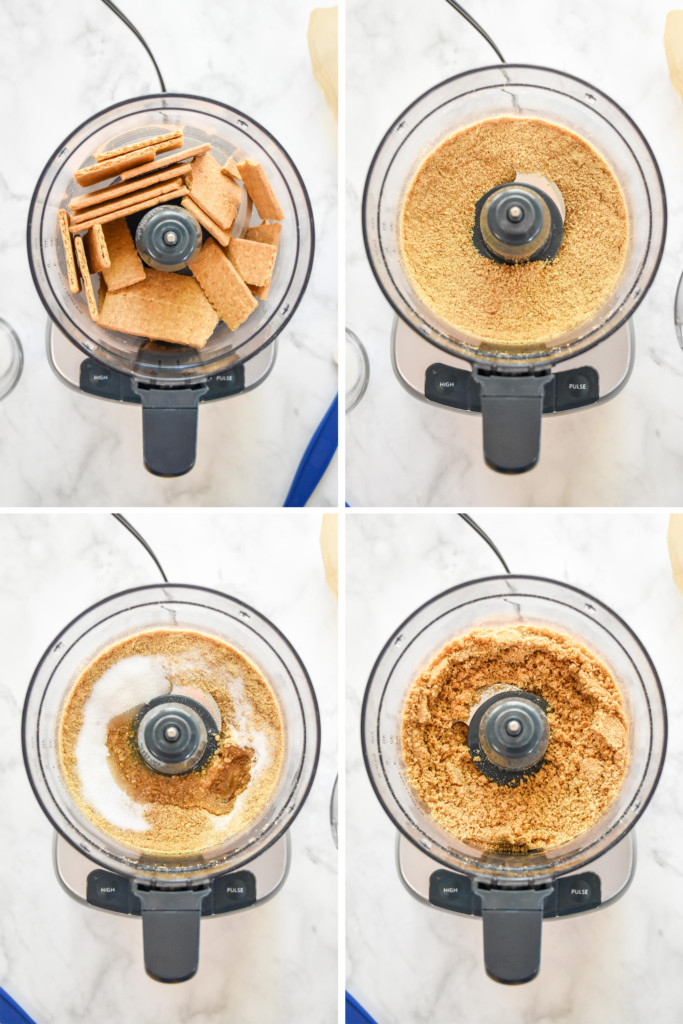
Start with the crust – take one sleeve of graham crackers and empty it into the food processor bowl. Feel free to break crackers as needed so they all fit into the bowl.
Pulse and blend until the crackers are processed into crumbs. Add the sugar and coconut oil, then pulse and blend again until completely mixed and the crumbs are sticking together.
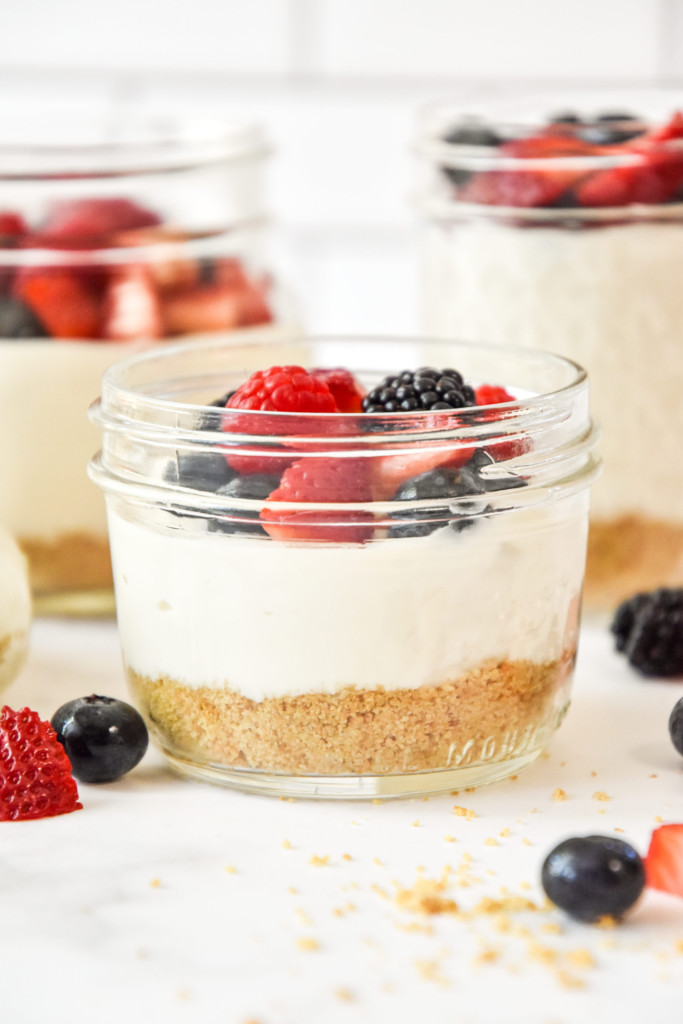
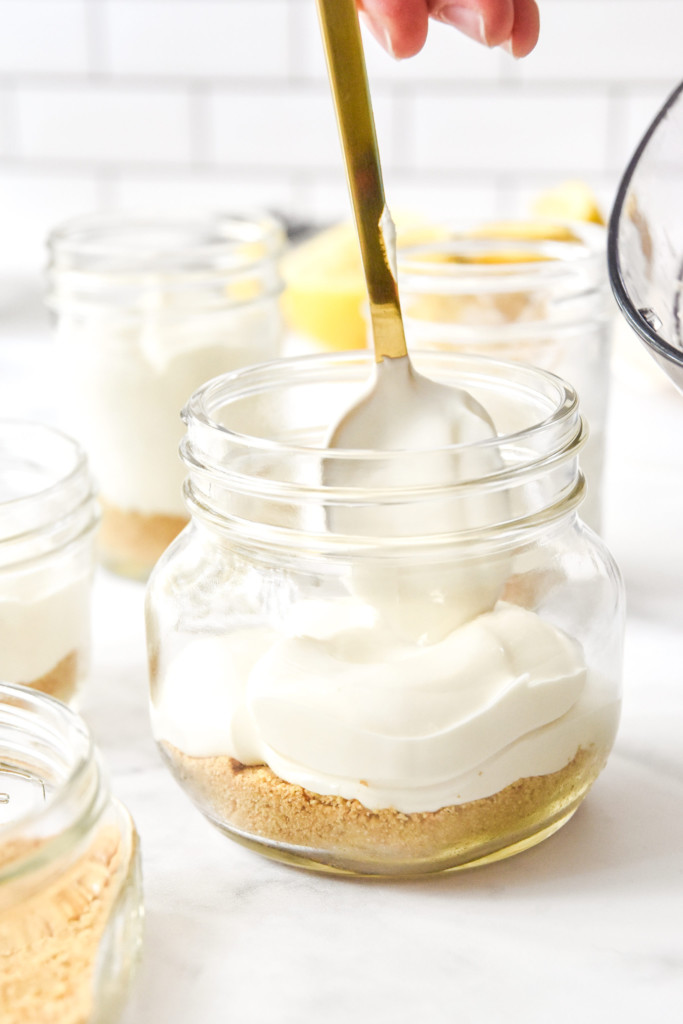
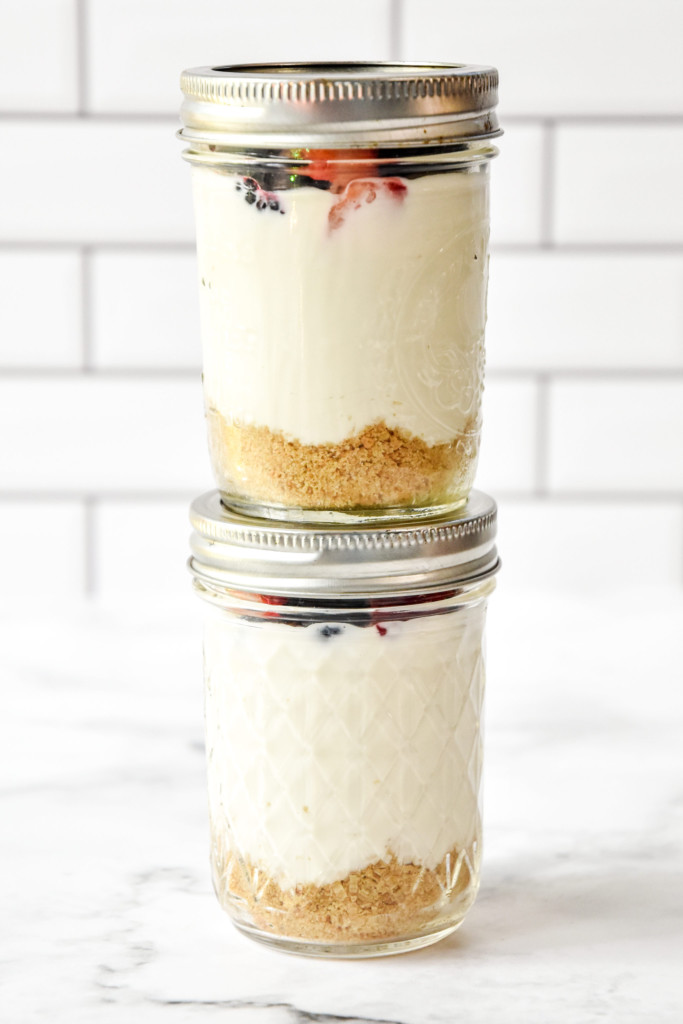
Divide the blended crust mixture into your mason jars or bowls. You can use any small jars or containers you want – as long as they come with a lid if you’re planning to store in the fridge overnight.
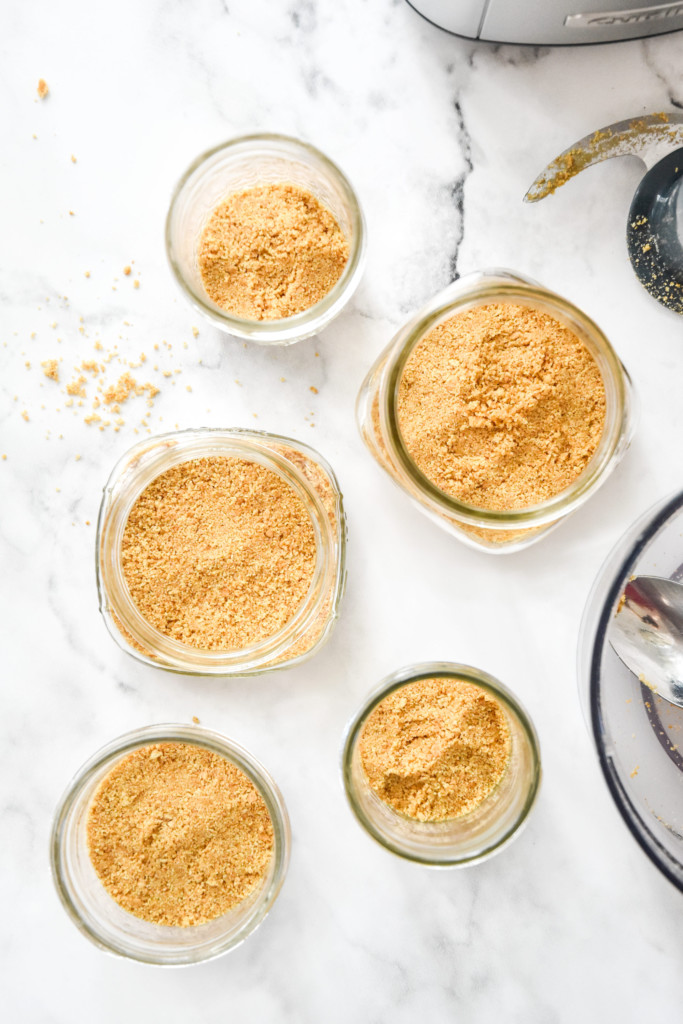
Using wider and shorter jars will give you more surface area for crust – using thinner taller jars will give you less area for crust, but you can always make the crust layer a bit thinner.
Next, move on to the cheesecake yogurt filling mixture. Make sure to clean out the food processor bowl after you make the crust, before you make the filling. It’s okay if you don’t wash it, but for the smoothest filling, we don’t want any crumbs mixed in!
First, add the cream cheese to the food processor bowl. Pulse a few times until the cream cheese is blended around the bowl. I like to whip or mix the cream cheese first so it’s as smooth as possible before putting the rest of the ingredients in.
Next, add the maple syrup, lemon juice, vanilla, and salt. Put the lid on and pulse several times, stopping to push down the sides of the bowl with a rubber spatula a couple times while processing.
You should end up with a thick, smooth mixture with no lumps of cream cheese. If you have any lumps on the sides of the bowl, push it down into the mixture and blend for a few more seconds.
Finally, add the Greek yogurt in large spoonfuls to the bowl on top of the cream cheese mixture. Put the lid on and blend for 20-30 seconds, again stopping to push down the sides of the bowl as needed.
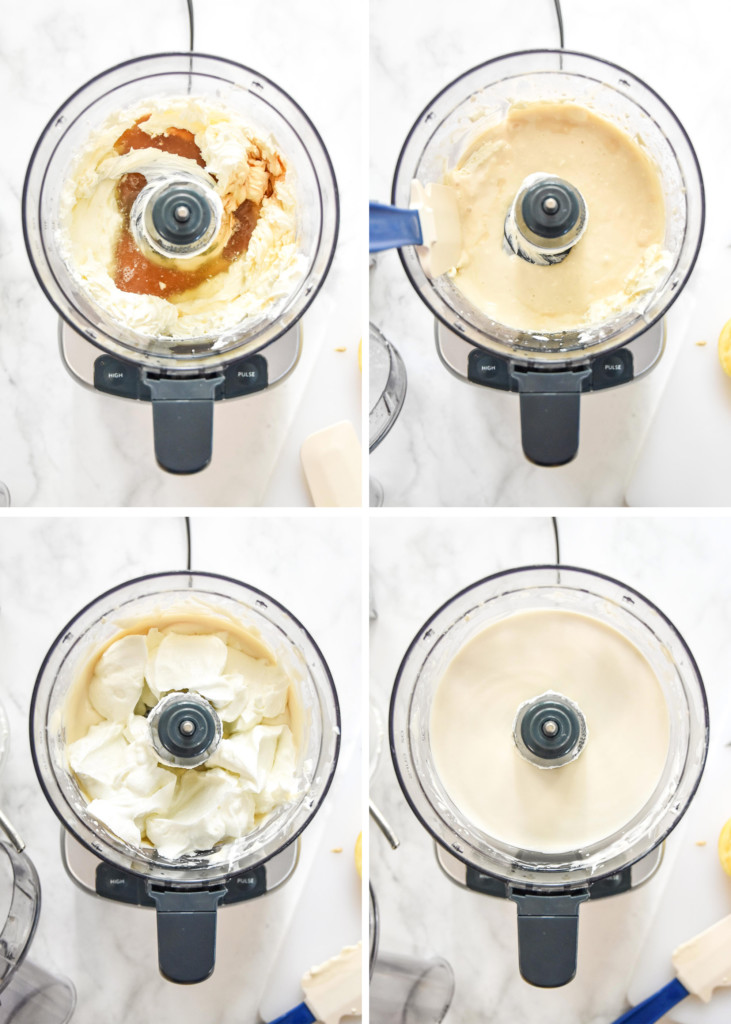
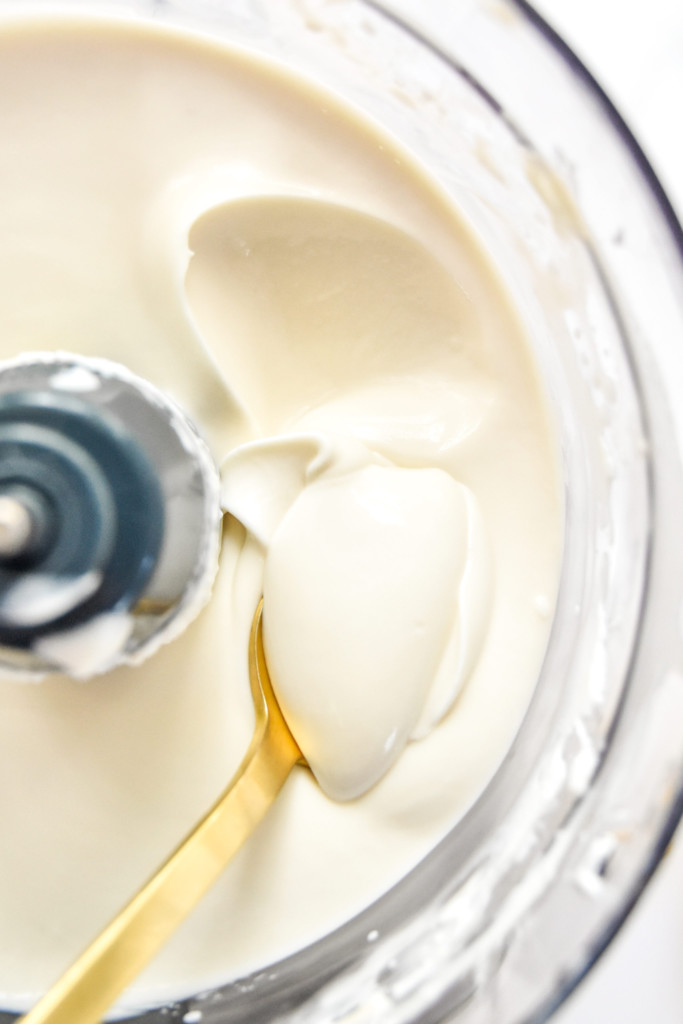
At this point, you should have a smooth, thick and creamy, off-white mixture that tastes like cheesecake. Feel free to give it a taste here and adjust as needed!
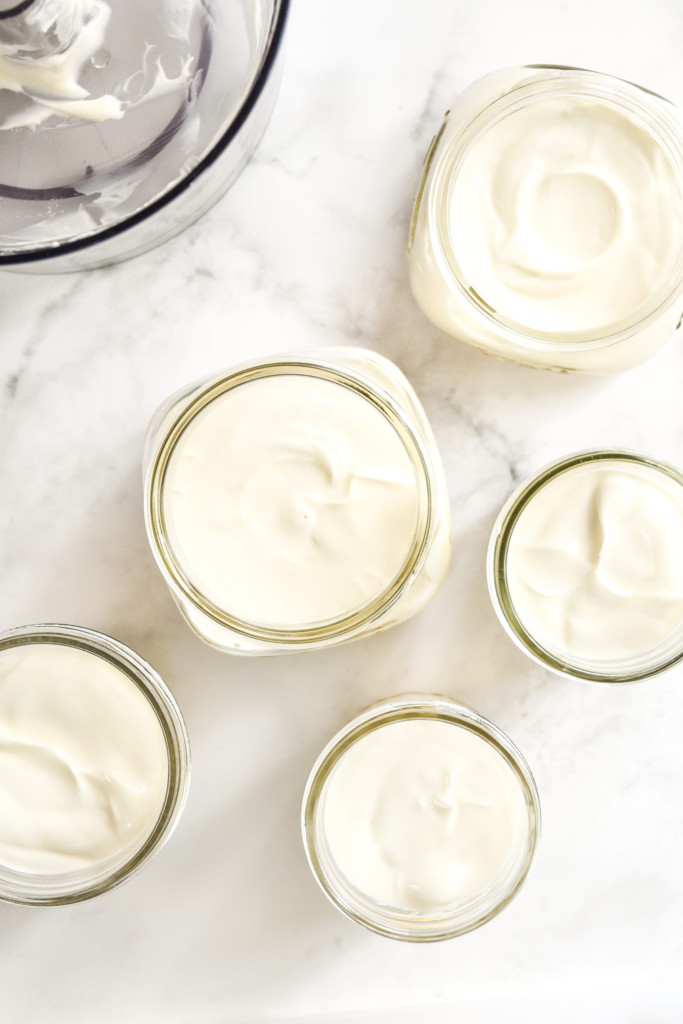
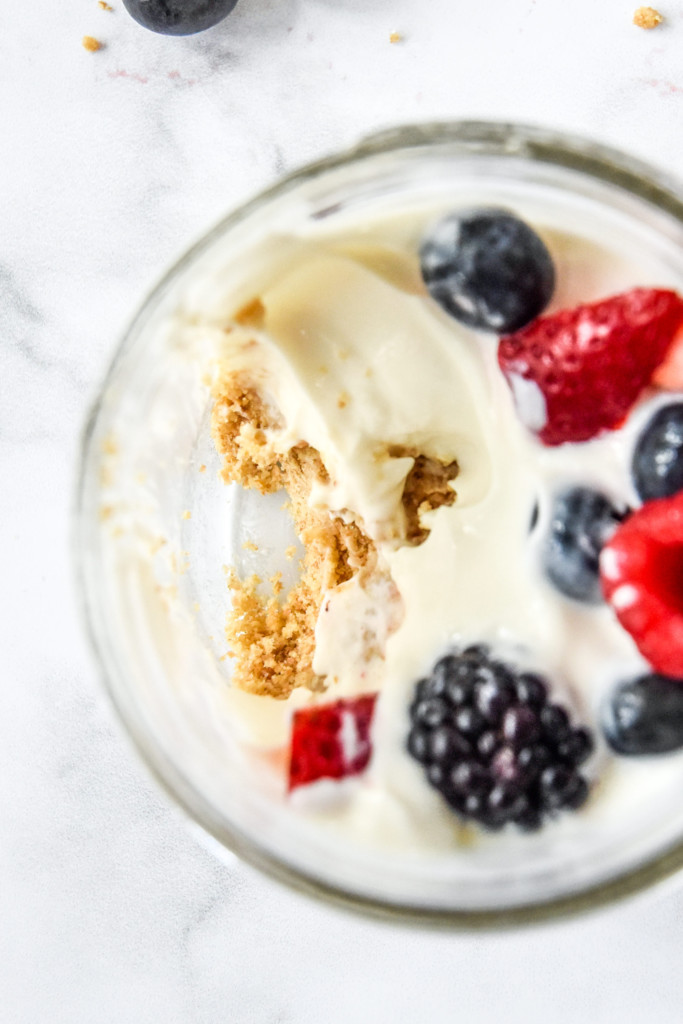
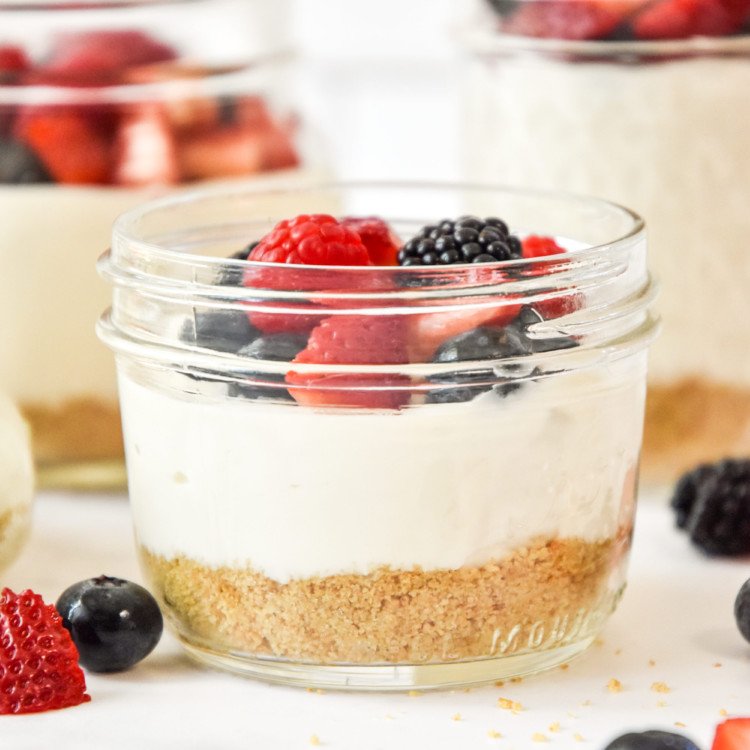
Time to assemble and add the finishing touches. Pour the cheesecake yogurt mixture into the mason jars on top of the crust – divide evenly between all containers, leaving about an inch of room at the top if you want to add berries.
Top with berries – I did a combo of mixed berries for these photos, but you can go with your favorite kind, another chopped fruit, or nothing at all.
You can also make a fruit sauce for the topping, which would be a more classic cheesecake move. I love my Easy Strawberry Sauce for this!
Serve this with…
Testing notes for these No-Bake Cheesecake Greek Yogurt Cups:
Here are some things I noticed while testing these cute little cheesecake yogurt cups:
- In general, dairy products with a higher fat content will give you better tasting, creamier results, with an overall thicker texture. Using fat free products will work for this recipe, but will compromise on texture and taste.
- I tested both butter and coconut oil for crust, and they both worked great. I actually liked the very mild coconut taste in the crust.
- The cheesecake yogurt mixture will thicken as it chills! You can taste it immediately, but I prefer it after it’s been in the fridge for at least a couple hours.
What equipment do you need to make these yogurt cups?
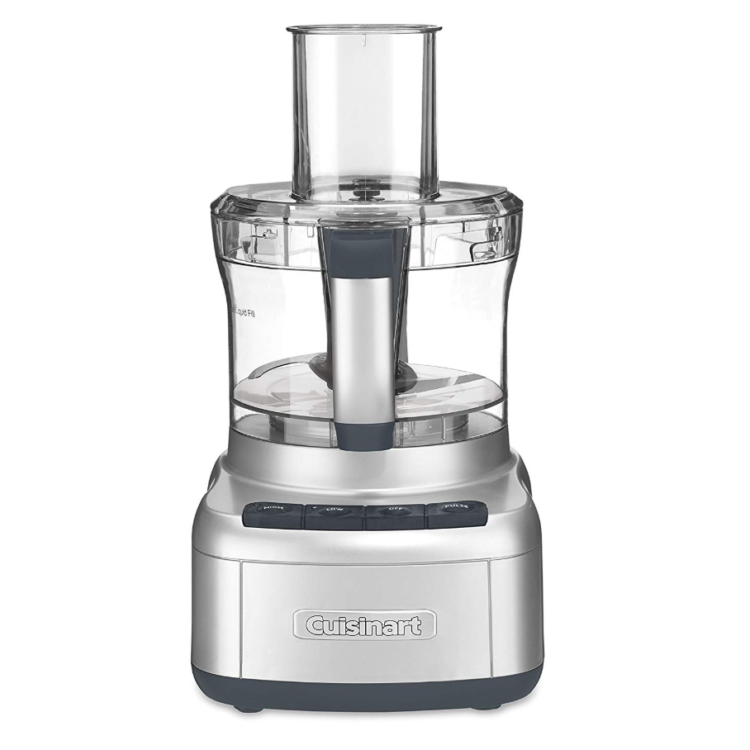
To make this recipe, I used a Cuisinart 8-Cup Food Processor for both the crust and the filling, washing it in between steps. I think this is the quickest way to make these No-Bake Cheesecake Greek Yogurt Cups.
This recipe could be made without a food processor. You could put the graham crackers into a Ziploc and crush until you have crumbs. For the filling, you could use a hand mixer, or beat by hand (no thanks).
How do you meal prep these No-Bake Cheesecake Greek Yogurt Cups?
This recipe was made for meal prep! These single serving cheesecake yogurts work the best as a make-ahead dessert, snack or breakfast option.
To meal prep, follow the recipe as written and store your individual yogurt cups in the fridge.
What to serve with these No-Bake Cheesecake Greek Yogurt Cups:
These yogurt cups are wonderful served on their own, topped with lots of berries! You could also serve with breakfast, adding some oven cooked bacon or Instant Pot egg bites to go with.
Alternative customization ideas:
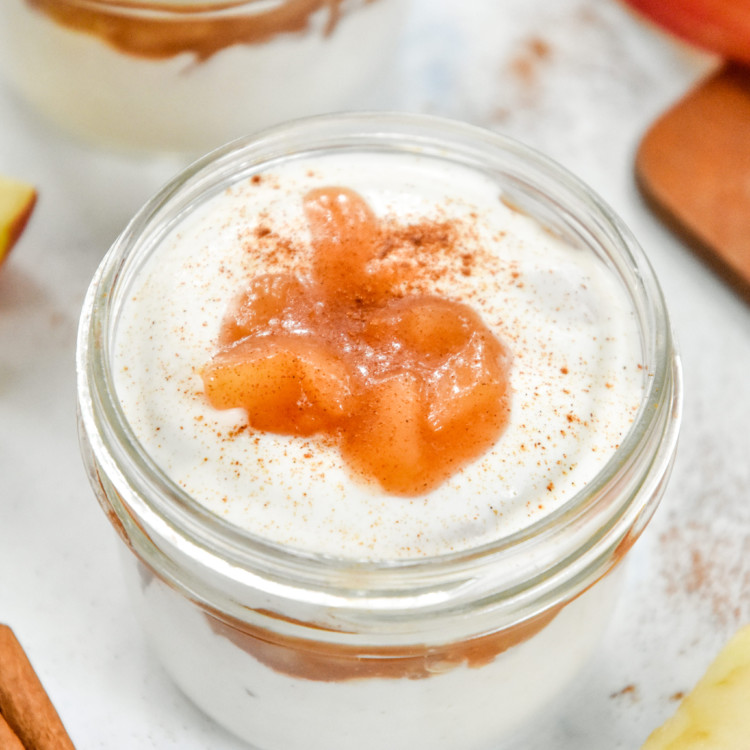
Any way you would customize a cheesecake, you can customize these yogurt cups! Add some crushed up oreos, top with whipped cream and sprinkles, or do a sauteed cinnamon apple topping. You could also change up the crust with a different cracker or cookie of your choice!

How to store prepared No-Bake Cheesecake Greek Yogurt Cups:
Store prepared cheesecake yogurt cups with the lid on in the fridge and enjoy within 5 days for best quality.
How to freeze No-Bake Cheesecake Greek Yogurt Cups:
I have not yet tested this recipe in the freezer because we keep eating them too quickly! I do think they could work in the freezer, although the texture of the filling would most likely change. If you try this, let me know how it turns out!
Did you make this? I want to see how it turned out! Tag me in your social media post @projectmealplan and use #projectmealplan when you share!
No-Bake Cheesecake Greek Yogurt Cups
These No-Bake Cheesecake Greek Yogurt Cups feature a classic graham cracker base, topped with homemade cheesecake flavored Greek yogurt filling. Portion into mason jars for make-ahead friendly single serve desserts anytime!
Ingredients
- 1 sleeve of graham crackers (9 crackers)
- 1 tablespoon white or brown granulated sugar
- 3 tablespoons coconut oil, melted
- 8 ounces full fat cream cheese, softened
- 4 tablespoons pure maple syrup
- 2–3 tablespoons lemon juice (juice from one lemon)
- 1 teaspoon vanilla extract
- 1/4 teaspoon fine sea salt
- 16 ounces (about 2 1/4 cups) 2% or whole fat plain Greek yogurt (see note)
- optional: 1 1/4 cup mixed berries of choice or homemade strawberry sauce
Instructions
- Make the crust: Remove the graham crackers from the sleeve (1) and place them into the bowl of a food processor. Pulse for about 20 seconds, until the crackers are completely processed into crumbs. Add the sugar (1 tablespoon) and coconut oil (3 tablespoons, melted), then pulse again until the mixture is completely blended and the crumbs begin to stick together.
- Portion crust mixture: Divide the graham cracker mixture between 4-5 mason jars or bowls, and use the back of a spoon to press the crumbs down firmly into a distinct layer. It doesn’t have to be perfect! Wash the bowl of the food processor before moving on to prepare the filling.
- Make the filling: Add cream cheese (8 ounces, softened) to the clean food processor bowl. Put the lid on and blend until the cream cheese is smooth, about 15 seconds. Next, add maple syrup (4 tablespoons), lemon juice (2-3 tablespoons), vanilla extract (1 teaspoon), and salt (1/4 teaspoon) to the food processor bowl. Blend on high and use a rubber spatula to push down the sides as needed. Once completely blended and smooth, add the Greek yogurt (2 1/4 cups) to the food processor. Pulse on high for about 20 seconds, stopping to push down the sides if needed. The final mixture should be completely smooth and creamy.
- Portion the filling: Divide the prepared yogurt filling mixture between the 4-5 containers with graham cracker crust. If needed, gently knock the bottom of the container on the counter to help remove air bubbles and flatten the surface of the yogurt mixture.
- Serve & store: To serve, top with your choice of berries (or any topping you like!). Enjoy now, or for a thicker result (my preference), put the lids on and store in the fridge for at least 4 hours before enjoying. The yogurt mixture will thicken as it chills. Store prepared cheesecake yogurt cups in the fridge and enjoy within 5 days for best quality.
Equipment
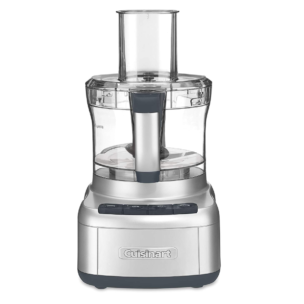
Cuisinart 8-Cup Food Processor
Buy Now →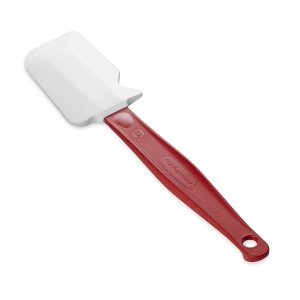
Rubbermaid High Heat Spatula Scraper
Buy Now →(affiliate link!)
Notes
Greek yogurt: Use a thicker brand of Greek yogurt, such as Fage. Stick with 2% or 5%, as the non-fat version will have more water and the final result will not be as thick and creamy. Nutrition information estimated with My Fitness Pal.
Nutrition Information
- Serving Size: 1 yogurt cup
- Calories: 350
- Fat: 16g
- Carbohydrates: 34g
- Fiber: 1g
- Protein: 17g
Frequently Asked Questions
What kind of containers should I use to store these cheesecake cups?
Any container with lid that can fit around 8 ounces will work for these yogurt cups. I really like using Half Pint Wide Mouth Mason Jars, or anything around that size!
Can I use fat free yogurt and cream cheese?
Yes, the recipe would work and still taste good if you used fat free dairy items, but the texture and creaminess will not be as good. I recommend sticking with regular cream cheese and at least 2% fat Greek yogurt.


Mehjabeen says
Hi im trying to wonder if its a cheesecake because cheesecakes needs heavy cream an dont need yogurt
Danielle says
It’s a variation of a no-bake cheesecake. It tastes like cheesecake, though it is made with yogurt as you said. Hope this helps.
Mehjabeen says
Hi another thing i wanted to know is it possible to make, the thing is i have only muffin tin an springform tin so i usually make my cheesecake in there so wil u recommend muffin tin or springform tin for this
Danielle says
Hello – Good question. I would recommend making this directly in small single serve cups with lids if possible. This won’t set like a traditional cheesecake, so it would be hard to transfer. If you don’t have individual cups, maybe a larger bowl to present it and then take smaller scoops for portions. Hope this helps! -Danielle
Kikilee says
Looking forward to making this