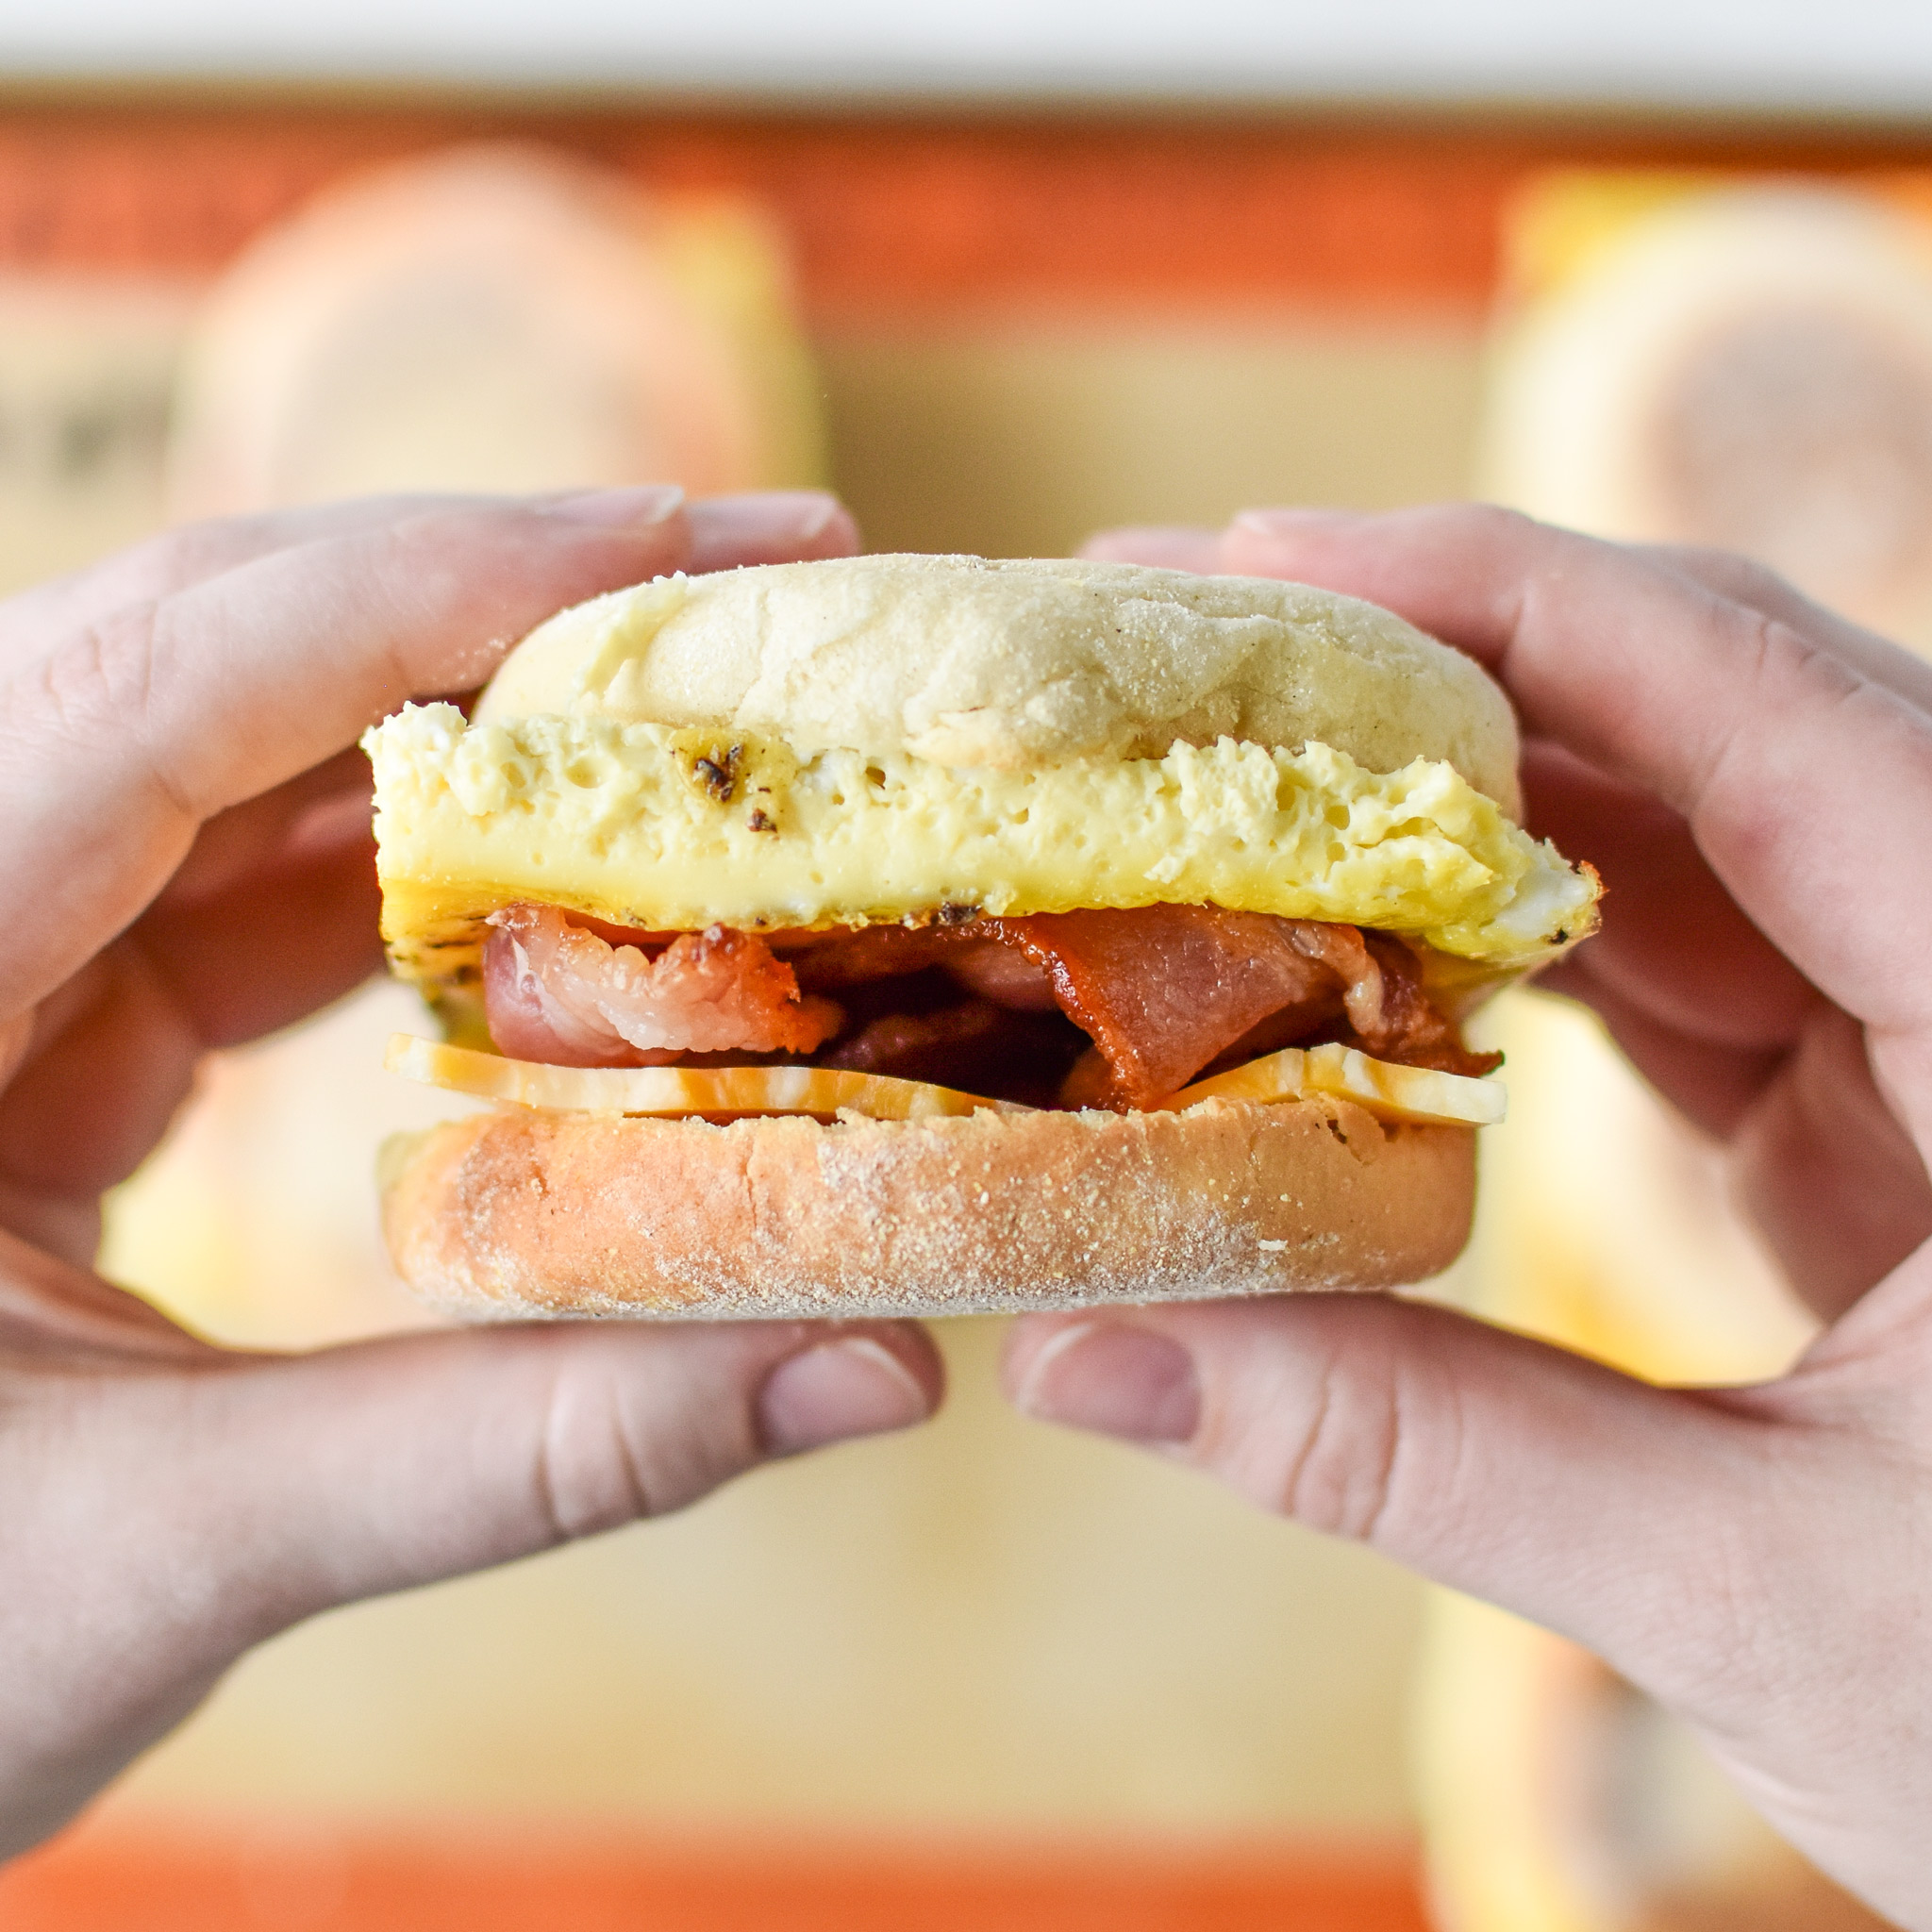
Make-Ahead Bacon Breakfast Sandwiches are the solution to ending that morning drive-through habit! Meal prep these bacon, egg and cheese sandwiches for a quick anytime breakfast the whole family will love.

Get my Best Make-Ahead Breakfasts eBook 💌
If you don’t love a good breakfast sandwich, I’m not sure we can be friends. I just love that egg and cheese on a crispy-edged English muffin goodness. How can you not?
However, I will acknowledge that buying breakfast sandwiches every day is not that great for your wallet. So I propose a solution: make your own!
Best part: Make them however you want, with whatever ingredients you want. And they’re probably better for your that way.

Note from Danielle
This recipe was originally published on November 2nd, 2018! I’ve made a lot of breakfast sandwiches since then.
It’s now March 2022 and this post needed a major refresh! Today, I updated this recipe and the entire post with more helpful content, clear recipe instructions, and a brand new video! Text above is from 2018, but everything else has been rewritten.
Recipe Overview
Total Time: 40 minutes
Difficulty: Easy
Method: Baked
Prep: Make-Ahead Friendly

Watch how to make these Make-Ahead Bacon Breakfast Sandwiches (1 min 38 sec):
What are the ingredients in these make-ahead bacon breakfast sandwiches?
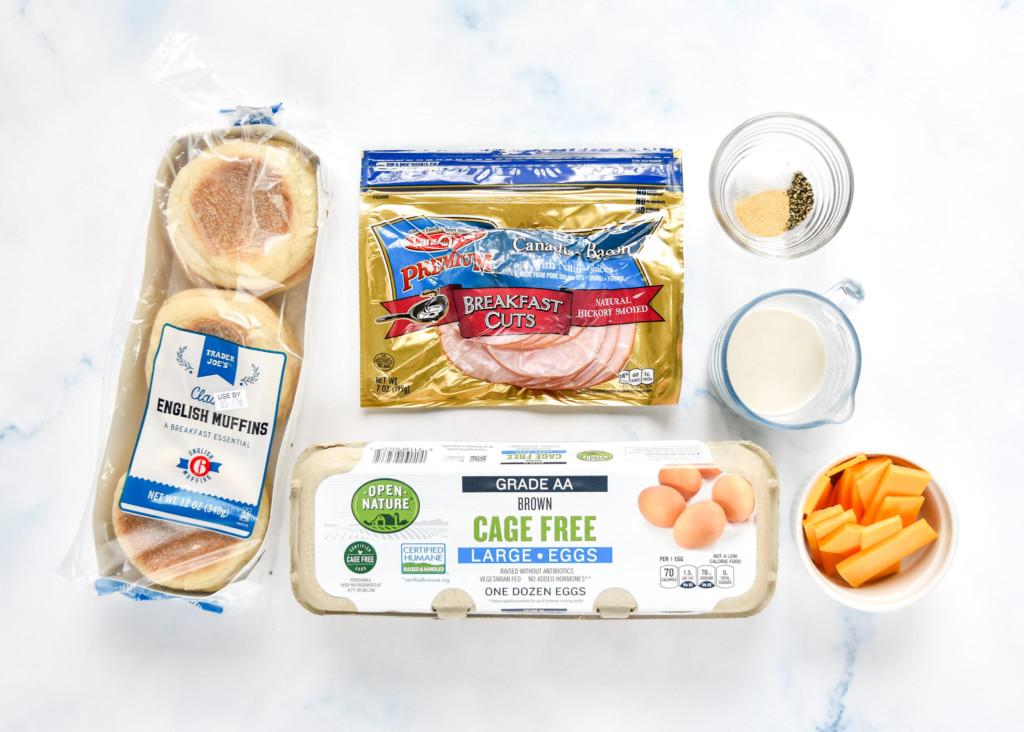
You’ll love how simple it is to make six of these sandwiches at home. You can personalize with your favorite English muffins, breakfast meat, cheese, and spices. Here’s what I used for my sandwiches:
- large eggs – There are quite a few ways to cook your eggs for breakfast sandwiches. This post will teach you my favorite way!
- milk – Whisking in just a touch of milk helps make your eggs go a bit further, and give them a slightly smoother texture that I enjoy.
- seasonings: salt, pepper & garlic powder – This is my preference. I always recommend salt and pepper, but you can add other things like onion powder, chili powder, etc.
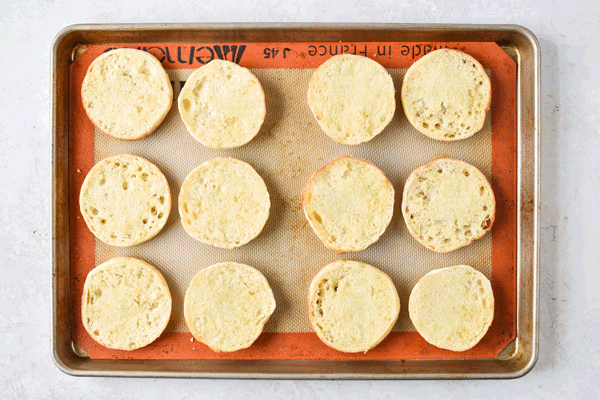
- English muffins – I prefer to toast the English muffins before assembling the sandwiches. Even if they don’t perfect hold their toast after storage, it’s still nice to have some crunch and flavor from browning.
- bacon – You can stick with classic bacon and follow the original pictures in this post (so delicious!), or you can save time and go with Canadian bacon (like in the video), which is already smoked and comes in precut or a big hunk from the grocery store.
- cheese – I usually use sliced cheddar cheese, but whatever cheese you like or have on hand will work! Go with your favorite. Save time with pre-sliced or save money by slicing your own.
I tested a couple different ways to make the eggs for these sandwiches, several ways to reheat them, and picked up a trick or two about getting the bacon to work right for these sandwiches. Here’s what I learned from my testing and how it can help you make better breakfast sandwiches!
How do you cook the eggs for breakfast sandwiches?
For these breakfast sandwiches, I had three goals when it came to my breakfast sandwich eggs:
- Waste no eggs.
- Quick and easy.
- Minimal clean up.
First, I thought circular eggs were vital to breakfast sandwich success. So, I tried it. Like I said above, I didn’t want to waste any eggs (or have leftovers), so I cooked the eggs in mason jar rings, two at a time.
Did it work? Sure. It “worked”. But it took FOREVER. And I was left with gross eggy rings that had so much egg stuck on them, they were a lost cause. I oiled the rings thoroughly, and was still left with a mess.
So I quickly moved on to the next idea, which I believe I first saw in a Tasty recipe video on Facebook a very long time ago. That idea is way more hands-off, easier to clean, and faster. I was instantly sold.
Here’s how you do it:
- Start with a rectangular baking dish (9×13 is perfect).
- Grease it very well, or line with parchment paper!!, both ways work.
- Whisk your eggs with some milk, salt and pepper and preferred seasonings.
- Pour them in the prepared dish.
- Bake for around 25 minutes or until no longer jiggly.
- Slice and put on the sandwiches. So EASY.


How do you cook the bacon for breakfast sandwiches?
My friends and family would be the first to call me out about eating pork (bacon), because I haven’t been a red meat eater since before college. But, lately I’ve started caring more about where my meat comes from, instead of what animal it is.
Thank you ButcherBox! Every month, a box of sustainably and humanely raised chicken, pork and (sometimes) beef comes right to my door.
Growing up, I was mostly just exposed to pre-cooked microwave bacon, which is SO different from ButcherBox (affiliate link!) bacon, they should not even be compared in the same category.
The bacon from ButcherBox (affiliate link!) has zero added sugar and is Whole30 approved. One of the only brands that is so. It’s quality stuff, and I’m sure you’ll agree if you try it!

There are a few ways you can cook bacon for these Make-Ahead Bacon Breakfast Sandwiches:
- Cook your bacon in the oven. Once the bacon is out of the oven and slightly cooled, break each piece in half so it fits on your breakfast sandwich.
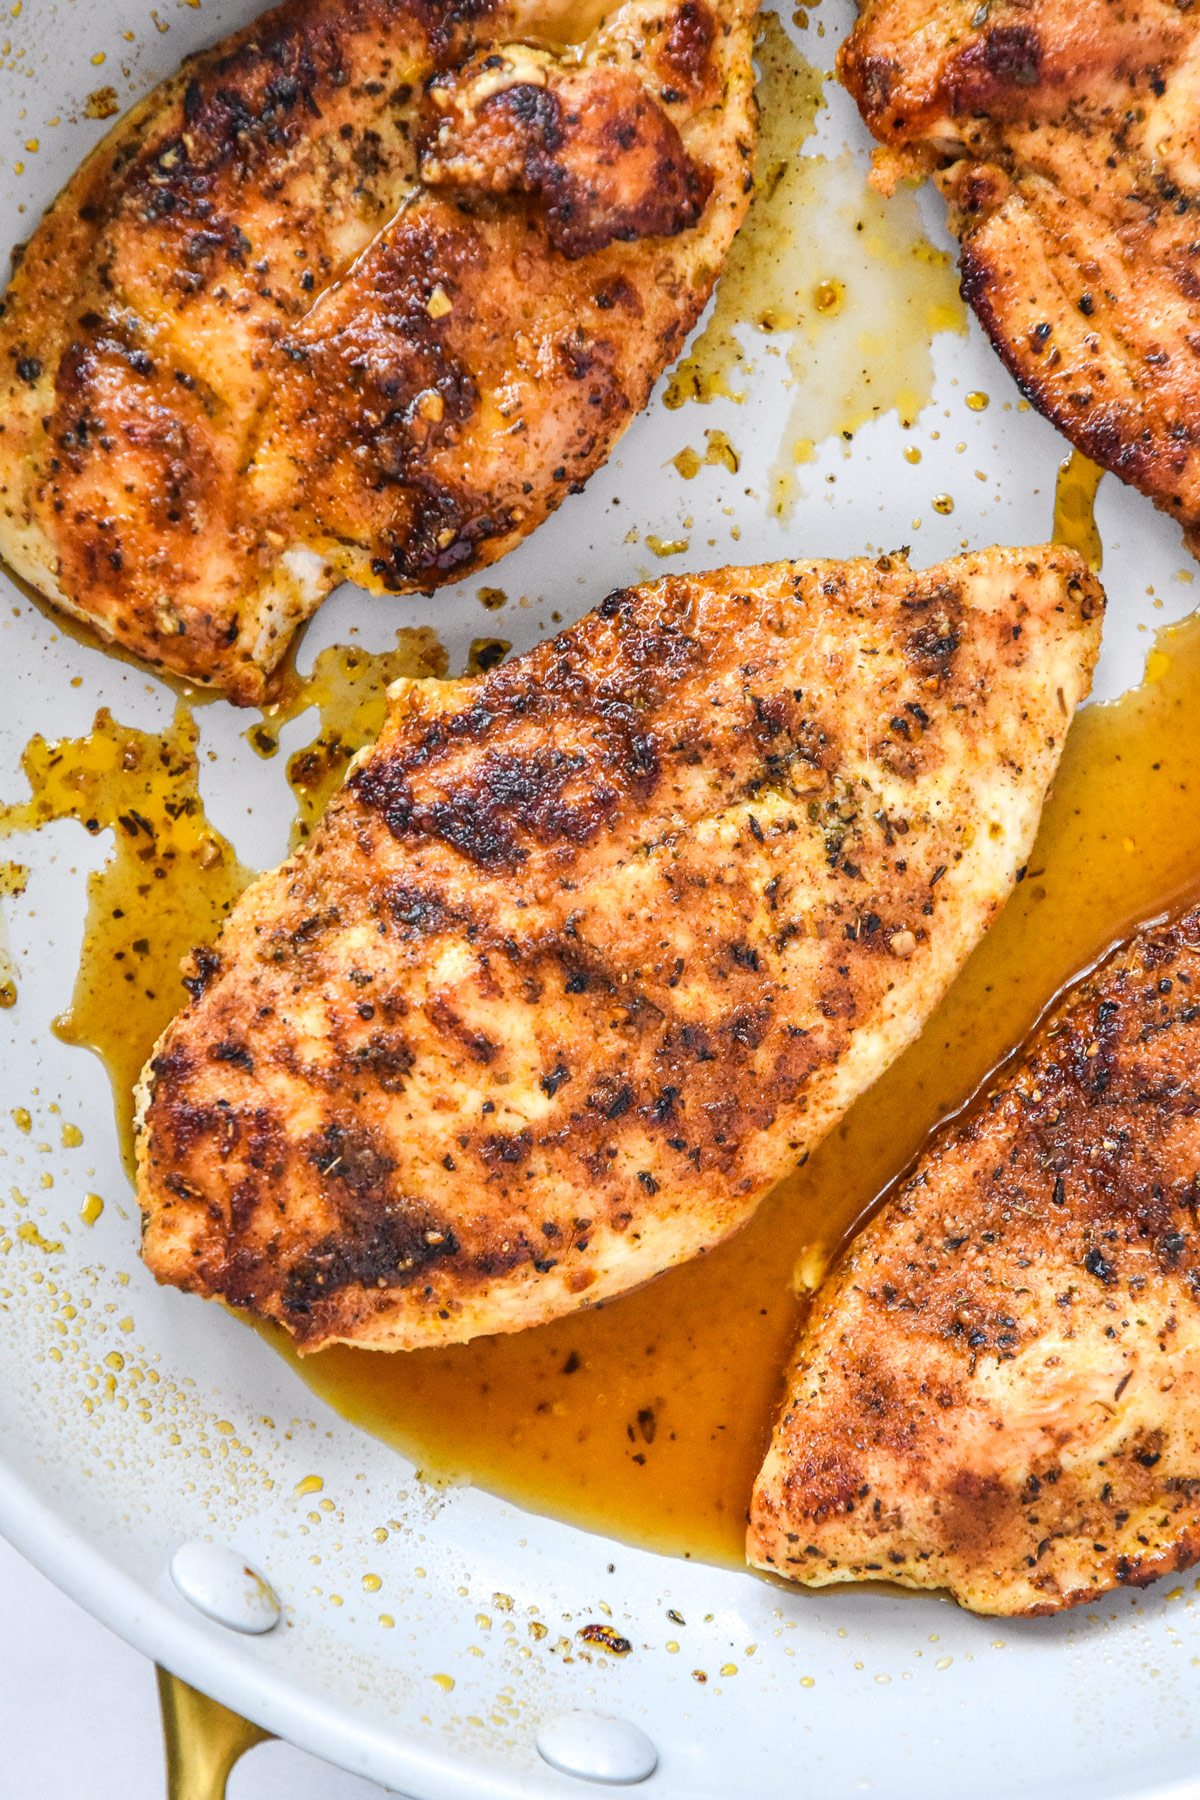
- Cook your bacon on the stovetop in a deep skillet or Dutch oven in two batches. Heat the pan over medium heat. Once the pan is well preheated, add strips of bacon. Using tongs, flip after a couple minutes, let them cook through to your desired crispness, and then place on a plate lined with paper towels. TIP: Fold the bacon into a V shape while hot and pliable (see photo above). The bacon will cool and slightly harden in this shape, and fit perfectly onto your sandwich.
Another option is to go for Canadian bacon, which is already smoked and fully cooked. That way, you can skip the bacon cooking stage!
Here’s how easy it is to assemble the sandwiches:

How do you wrap the breakfast sandwiches?
Fun fact about me: I worked at a fast food restaurant in high school, and became a pro at wrapping sandwiches. Well… maybe not a “pro”, but it was my job so I learned how to do it.
If your breakfast sandwiches are going into the freezer, be sure to let the ingredients cool before assembling the sandwiches, or you’ll have a bag of frosty rocks rather than defrostable sandwiches!
To wrap my Make-Ahead Bacon Breakfast Sandwiches, I use parchment paper (update 2022 – I wrap parchment on the inside, foil on the outside so the sandwich doesn’t stick to the foil and the paper doesn’t burn in the air fryer). I do not measure the square, but I try to make it around 12 inches long.

Place the sandwich on the paper and fold each end over the top of the sandwich, like a present. Place your hands over parchment paper extending to each side, and tighten it down over the sandwich. Fold the top and bottom horizontal ends of each side up over itself, then fold each arm under the sandwich.
How to wrap sandwiches guide:
If that made no sense, you should reference this guide from Saveur called How to Wrap a Sandwich. There are drawings and an explanation that might be a little better than mine!
What are some variations of this breakfast sandwich recipe?
- Use whole wheat English muffins
- Add chopped veggies to the baked eggs for some variety
- Use slices of ham or other deli meat
- Change up your cheese flavor
- Skip the meat entirely and go for a vegetarian sandwich
- Use egg whites only
- So many options!

How to store these make-ahead bacon breakfast sandwiches:
These make-ahead sandwiches can be stored for up to 4 days in the refrigerator, or for up to 3-6 months in the freezer for best quality, though they’ve never lasted that long in my house.
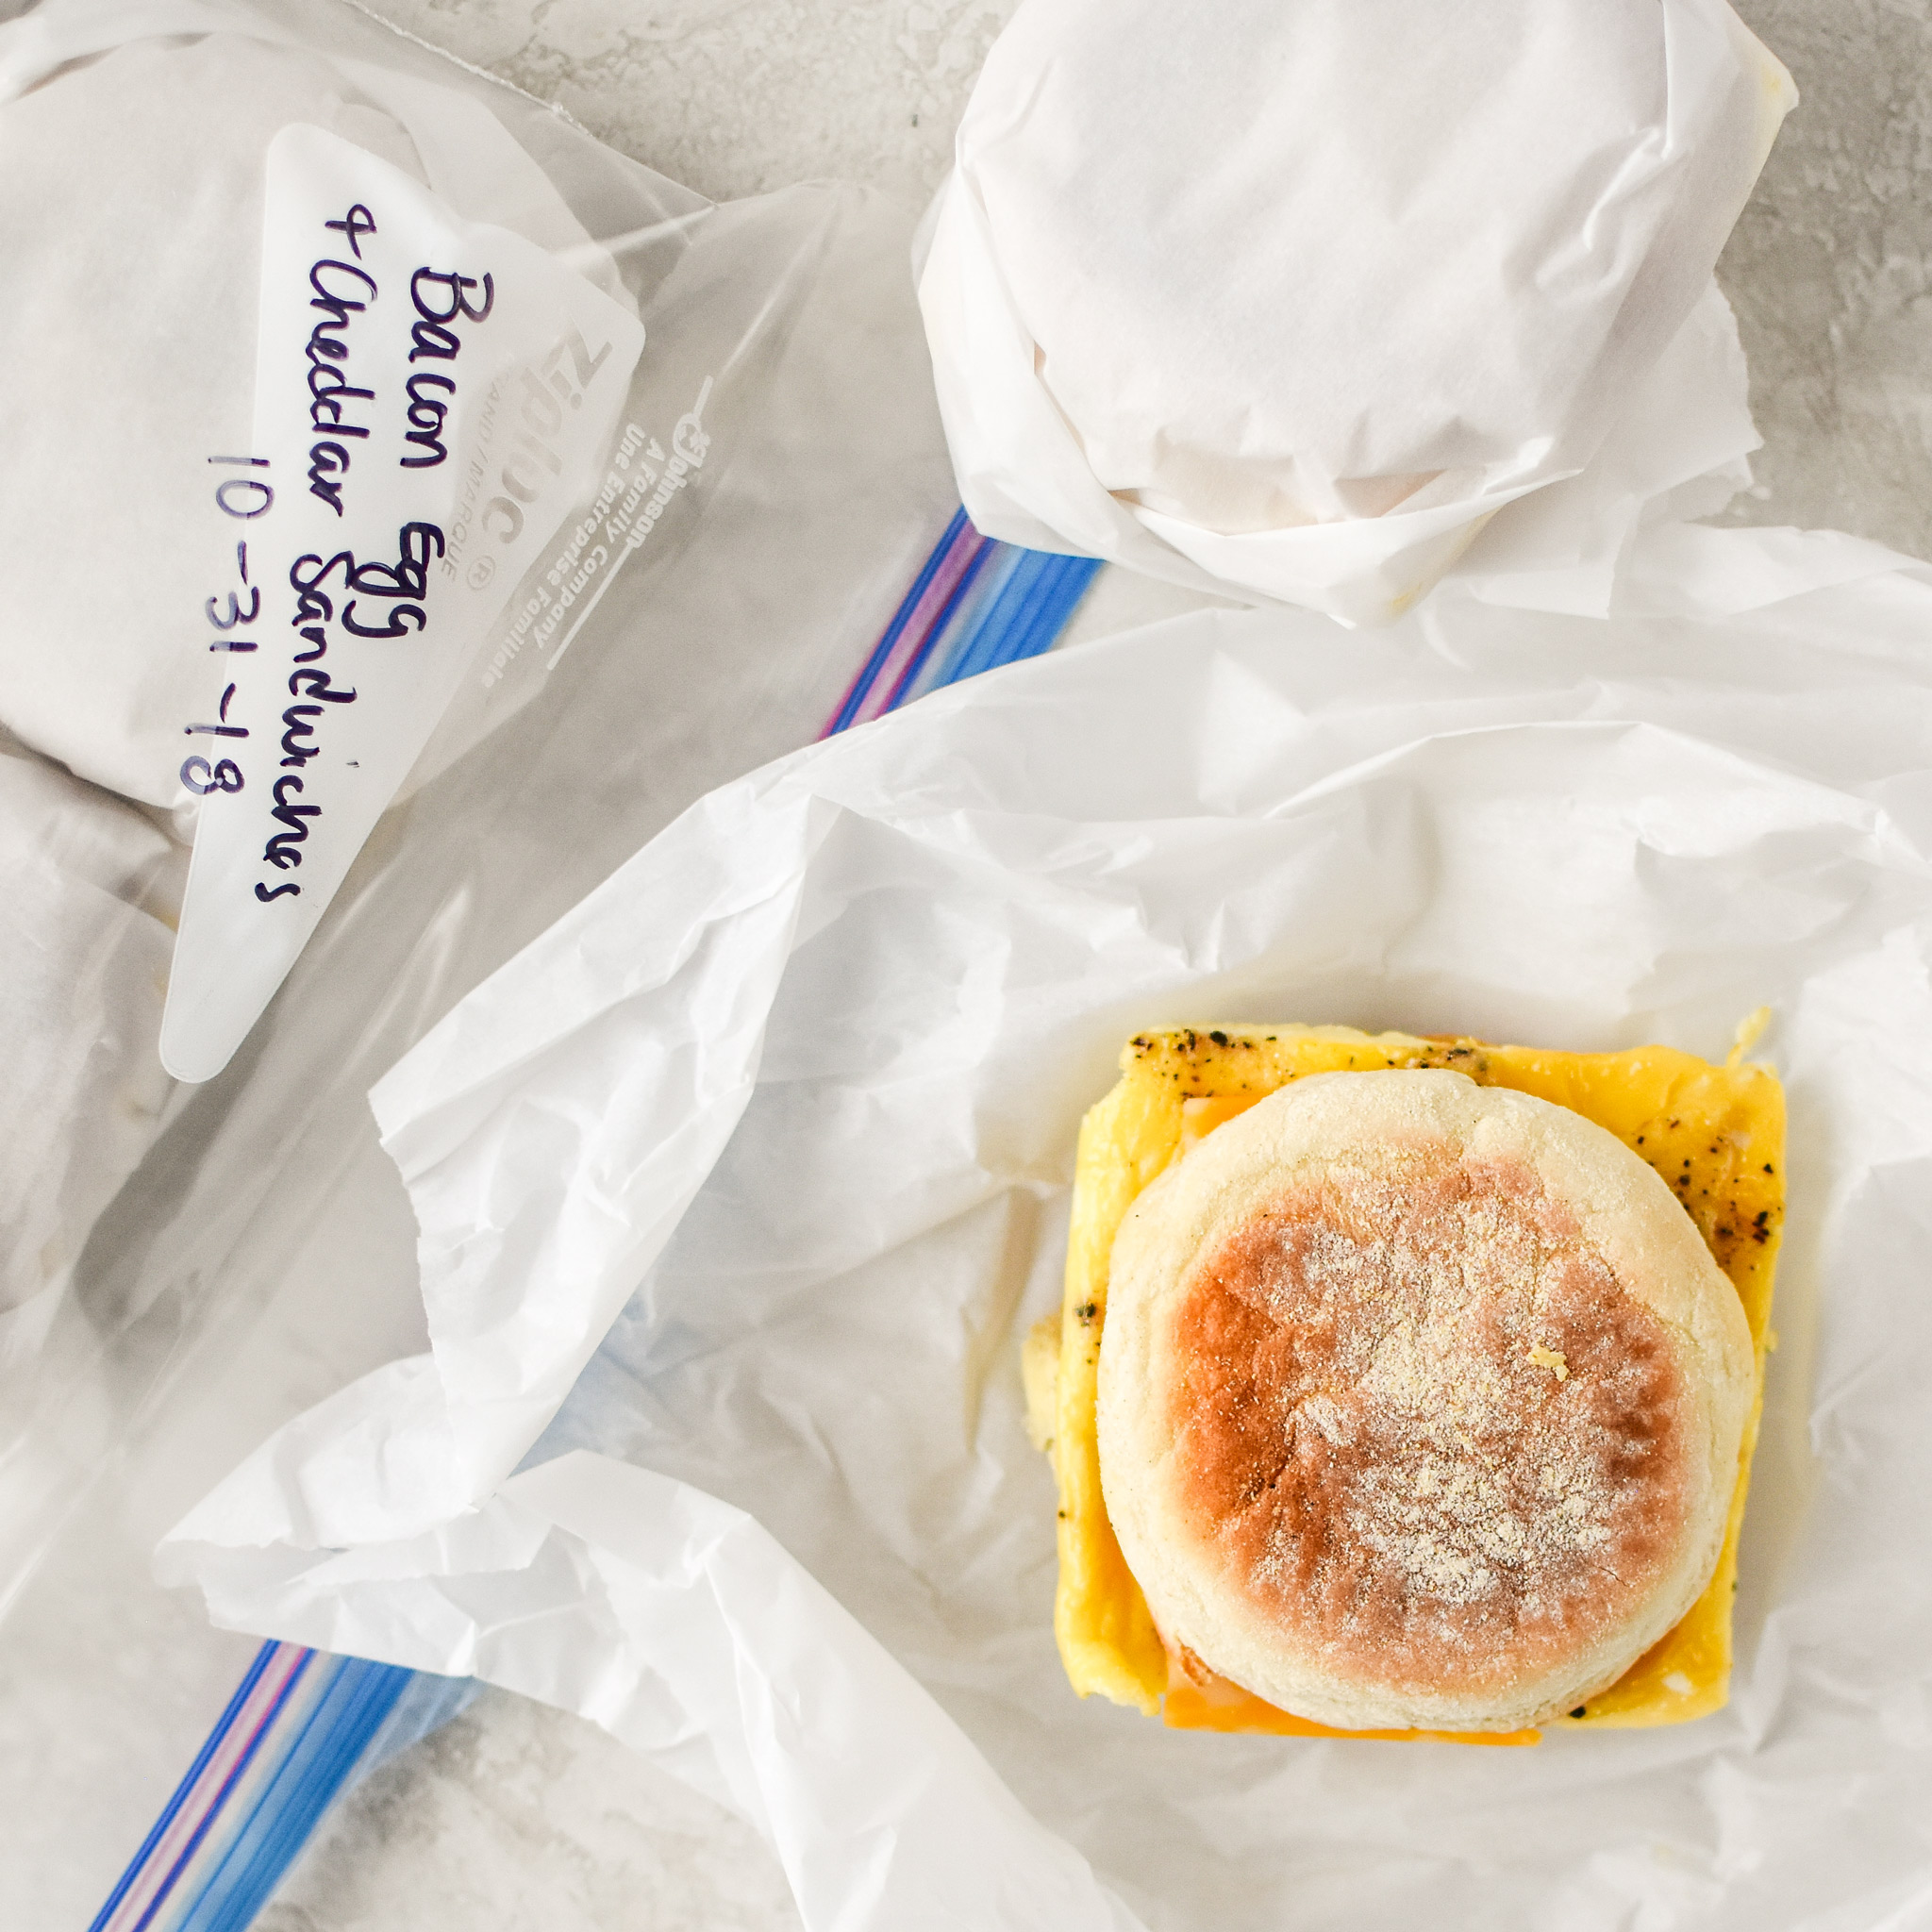
To store the Make-Ahead Bacon Breakfast Sandwiches, I wrap them in parchment paper and foil (as described above), and then place them all in a gallon Ziploc bag. Remember, you can reuse this bag lots of time since no food is actually touching it!

How to freeze assembled breakfast sandwiches:
Wrap each breakfast sandwich tightly in parchment paper surrounded by foil (or your preferred method!!), then store in another freezer safe bag or container. Be sure to label the container with the name of recipe and date cooked. For best quality, enjoy within 3-6 months.

How do you reheat these breakfast sandwiches?
There are lots of ways to reheat breakfast sandwiches. After reheating a couple of these sandwiches, you’ll figure out your preferred method pretty quickly.
- Microwave: microwave on High in 30 second increments for about 1 minute until heated through. From the freezer, reheat in the microwave on Medium-High power (I do level 7) in 30 second increments for about 2 minutes, flipping halfway through.
- Toaster oven: For a crispier muffin, separate the muffin from the insides and reheat the muffin separately in a toaster. Some people prefer this method, but I don’t mind a slightly softer melty cheesy breakfast sandwich straight from the microwave.
- Air fryer: This is my favorite method since I no longer own a microwave. From the fridge, heat at 350F for around 13 minutes until the center is hot!
Want to Save this recipe for later?
Did you make this? I want to see how it turned out! Tag me in your social media post @projectmealplan and use #projectmealplan when you share!
Print
Make-Ahead Bacon Breakfast Sandwiches
Make-Ahead Bacon Breakfast Sandwiches are the solution to ending your morning drive-through habit! Meal prep these bacon, egg and cheese sandwiches for a quick anytime breakfast the whole family will love.
- Total Time40 minutes
- Yield6 sandwiches 1x
Ingredients
- 8 large eggs
- 1/4 cup milk (dairy or non-dairy)
- 1/4 teaspoon garlic powder
- 1/4 teaspoon each salt & fresh ground black pepper
- 6 English muffins, cut in half
- 2 tablespoons butter, melted (optional for toasting muffins)
- 8 ounces quality bacon
- 6 slices cheddar cheese
Instructions
- Make the eggs: Preheat the oven to 350F. Grease a 8×11 or 9×13 inch glass or ceramic casserole dish well with non-stick cooking spray or coconut oil, or line with parchment paper and then grease for easier cleanup. Whisk eggs, milk, and seasonings in a bowl and then pour into the prepared baking dish. Cook for 23-26 minutes, until eggs are fully cooked and the center is no longer jiggly. Remove from the pan and cut into 6 equal slices, then set aside to cool.
- Make the bacon: While the eggs are cooking, make the bacon following your preferred method. You can use Canadian bacon (shown in video) or another pre-cooked breakfast meat if you want. Another option is to make your bacon ahead of time in the oven (recipe here!).
- Heat a deep skillet or Dutch oven over medium heat. When hot, add strips of bacon. Using tongs, flip after a couple minutes, let them cook through to your desired crispness, and then place on a plate lined with paper towels. Repeat with remaining bacon.
- TIP: After cooking, fold the bacon into a V shape on the paper towels while hot and pliable (see photo above). The bacon will cool and slightly harden in this shape, and fit perfectly onto your sandwich. Set aside to cool.
- Toast the muffins: Lay the English muffin halves out on a half size baking sheet, cut side facing up. Optional: Brush each with melted butter. Place into the 375F oven for 5-7 minutes or until the edges are crispy and golden brown, or toast in your toaster oven as you prefer. If toasting at the same time as cooking the eggs, put the eggs on the bottom rack and the muffins on the top rack. Watch closely so they don’t burn.
- Assemble and store: Once all the parts are cooked and cooled, assemble your breakfast sandwiches: Add a slice of egg, one piece of bacon, and a slice of cheese. Wrap each sandwich in parchment paper and then foil (or your preferred wrapping method). If freezing, store all sandwiches in a gallon Ziploc bag and store sealed in the freezer, enjoy within 3-6 months. If refrigerating, use an airtight container and enjoy within 4 days.
- Reheating: There are several ways to reheat – after reheating a couple of these sandwiches, you’ll figure out your preferred method quickly.
- Microwave: microwave on High in 30 second increments for about 1 minute until heated through. From the freezer, reheat in the microwave on Medium-High power (I do level 7) in 30 second increments for about 2 minutes, flipping halfway through.
- Toaster oven: For a crispier muffin, separate the muffin from the insides and reheat the muffin halves separately in a toaster until hot and crispy.
- Air fryer: This is my favorite method. From the fridge, leave the wrap on and heat at 350F for around 13 minutes until the center is hot!

Notes
Bacon: Instead of cooking bacon for this recipe, you can save time by using Canadian bacon which is smoked and fully cooked.
Inspired by Breakfast Sandwich Meal Prep from Tasty. Nutrition information estimated with My Fitness Pal.
- Prep Time: 10 minutes
- Cook Time: 30 minutes
- Category: Breakfast
- Method: Baked
- Cuisine: American
Nutrition
- Serving Size: 1 sandwich
- Calories: 406
- Sugar: 3g
- Fat: 25g
- Carbohydrates: 24g
- Fiber: 3g
- Protein: 23g
Did You Make This?
I love seeing what you made! Leave a review below, and be sure to tag me at @ProjectMealPlan when you share a photo!


Think I could use small pancakes instead of english muffins??
Totally! Sounds delicious, let me know how it turns out! -Danielle